Copyright (c) 2015, RAJIV SHARMA (www.TechnicalDirector.in) . All rights reserved.
Design and Development by Rajiv Sharma.
RenderBOX is simply a rendering manager. This will help 3D and Compositing artists to track and manage there render sequences.
install renderbox and its plugins in you system. setup your scene file in blender/maya. submit render job from renderbox menu.
now open renderbox to see all queued jobs. right click and start your jobs.
you can stop render any time and it will start again from same frame where render aborted
Follow this script to build or install dependency for open VDB. most of them can be easy to get through YUM installer but some you required build from source codes.
#! /bin/bash
:’ this script will install dependency for Open VDB
and setup development environment
‘
# Install Important dependency for build Open VDB
# Install Python development files
yum -y install python-devel
# install cmake to build and compile dependency
yum -y install cmake
# OpenGL 3.2 = 4.5.0
# OpenGL will automatically installed with Nvidia Drivers
# Install BLOSC 1.5.3
# download – c-blosc-1.5.3.tar.gz
cd /tmp
tar xvf c-blosc-1.5.3.tar.gz
cd c-blosc-1.5.3
cmake .
make
make install
# =========================================================
# Install AutoMake 1.15
# download – automake-1.15.tar.xz
cd /tmp
tar xvf automake-1.15.tar.xz
cd automake-1.15
./configure
make
make install
# this error will come when you will compile log4cplus-1.2.0-rc3
:’
/hqvfx/development/openVDB/dependency/package/log4cplus-1.2.0-rc3/missing: line 81: aclocal-1.14: command not found
WARNING: ‘aclocal-1.14’ is missing on your system.
You should only need it if you modified ‘acinclude.m4’ or
‘configure.ac’ or m4 files included by ‘configure.ac’.
The ‘aclocal’ program is part of the GNU Automake package:
<http://www.gnu.org/software/automake>
It also requires GNU Autoconf, GNU m4 and Perl in order to run:
<http://www.gnu.org/software/autoconf>
<http://www.gnu.org/software/m4/>
<http://www.perl.org/>
make: *** [aclocal.m4] Error 127
‘
# create a symbolic link to fix this error
ln -s /usr/local/bin/aclocal-1.15 /usr/local/bin/aclocal-1.14
ln -s /usr/local/bin/automake-1.15 /usr/local/bin/automake-1.14
# Install LOG4CPLUS
# download – log4cplus-1.2.0-rc3.tar.xz
cd /tmp
tar xvf log4cplus-1.2.0-rc3.tar.xz
cd log4cplus-1.2.0-rc3
./configure
make
make install
# download – epydoc-3.0.1.zip
cd /tmp
unzip epydoc-3.0.1.zip
cd epydoc-3.0.1
python setup.py install
# Install GLFW
# download – glfw-3.1.1.zip
cd /tmp
unzip glfw-3.1.1.zip
cd glfw-3.1.1
cmake _GLFW_X11 .
make
make install
####################################################
Now we have to edit Makefile inside openvdb folder, all we need to do is specify the paths of dependency lib, include, headers files etc. for a quick reference i am posting my edited Makefile, checkout the bold letter lines.
# The directory into which to install libraries, executables and header files
DESTDIR := /hqvfx/development/openVDB/openvdb_build
# The parent directory of the boost/ header directory
BOOST_INCL_DIR := /usr/include/boost
# The directory containing libboost_iostreams, libboost_system, etc.
BOOST_LIB_DIR := /usr/lib64
BOOST_LIB := -lboost_iostreams -lboost_system
BOOST_THREAD_LIB := -lboost_thread
# The parent directory of the OpenEXR/ header directory
EXR_INCL_DIR := /hqvfx/development/openVDB/dependency/openexr/include
# The directory containing IlmImf
EXR_LIB_DIR := /hqvfx/development/openVDB/dependency/openexr/lib
EXR_LIB := -lIlmImf
# The parent directory of the OpenEXR/ header directory (which contains half.h)
ILMBASE_INCL_DIR := /hqvfx/development/openVDB/dependency/ilmbase-2.2.0/include
# The directory containing libIlmThread, libIlmThread, libHalf etc.
ILMBASE_LIB_DIR := /hqvfx/development/openVDB/dependency/ilmbase-2.2.0/lib
ILMBASE_LIB := -lIlmThread -lIex -lImath
HALF_LIB := -lHalf
# The parent directory of the tbb/ header directory
TBB_INCL_DIR := /usr/include/tbb
# The directory containing libtbb
TBB_LIB_DIR := /usr/lib64
TBB_LIB := -ltbb
# The parent directory of the blosc.h header
# (leave blank if Blosc is unavailable)
BLOSC_INCL_DIR := /usr/local/include
# The directory containing libblosc
BLOSC_LIB_DIR := /usr/local/lib
BLOSC_LIB := -lblosc
# A scalable, concurrent malloc replacement library
# such as jemalloc (included in the Houdini HDK) or TBB malloc
# (leave blank if unavailable)
CONCURRENT_MALLOC_LIB := -ltbbmalloc_proxy -ltbbmalloc
# The directory containing the malloc replacement library
CONCURRENT_MALLOC_LIB_DIR := /usr/lib64
# The parent directory of the cppunit/ header directory
# (leave blank if CppUnit is unavailable)
CPPUNIT_INCL_DIR := /usr/include/cppunit
# The directory containing libcppunit
CPPUNIT_LIB_DIR := /usr/lib64
CPPUNIT_LIB := -lcppunit
# The parent directory of the log4cplus/ header directory
# (leave blank if log4cplus is unavailable)
LOG4CPLUS_INCL_DIR := /usr/local/include/log4cplus
# The directory containing liblog4cplus
LOG4CPLUS_LIB_DIR := /usr/local/lib
LOG4CPLUS_LIB := -llog4cplus
# The directory containing glfw.h
# (leave blank if GLFW is unavailable)
GLFW_INCL_DIR := /usr/local/include
# The directory containing libglfw
GLFW_LIB_DIR := /usr/local/lib
GLFW_LIB := -lglfw3 -lGLU -lGL -lX11 -lXxf86vm -lXrandr -lpthread -lXi -lXcursor -lXinerama
# The major version number of the GLFW library
# (header filenames changed between GLFW 2 and 3, so this must be specified explicitly)
GLFW_MAJOR_VERSION := 3
# The version of Python for which to build the OpenVDB module
# (leave blank if Python is unavailable)
PYTHON_VERSION := 2.7
# The directory containing Python.h
PYTHON_INCL_DIR := /usr/include/python2.7
# The directory containing pyconfig.h
PYCONFIG_INCL_DIR := $(PYTHON_INCL_DIR)
# The directory containing libpython
PYTHON_LIB_DIR := /usr/lib64
PYTHON_LIB := -lpython$(PYTHON_VERSION)
# The directory containing libboost_python
BOOST_PYTHON_LIB_DIR := /hqvfx/development/openVDB/dependency/BOOST_PYTHON_LIB_DIR
BOOST_PYTHON_LIB := -lboost_python
# The directory containing arrayobject.h
# (leave blank if NumPy is unavailable)
NUMPY_INCL_DIR := /usr/lib64/python2.7/site-packages/numpy/core/include/numpy
# The Epydoc executable
# (leave blank if Epydoc is unavailable)
EPYDOC := epydoc
# Set PYTHON_WRAP_ALL_GRID_TYPES to “yes” to specify that the Python module
# should expose (almost) all of the grid types defined in openvdb.h
# Otherwise, only FloatGrid, BoolGrid and Vec3SGrid will be exposed
# (see, e.g., exportIntGrid() in python/pyIntGrid.cc).
# Compiling the Python module with PYTHON_WRAP_ALL_GRID_TYPES set to “yes”
# can be very memory-intensive.
PYTHON_WRAP_ALL_GRID_TYPES := no
# The Doxygen executable
# (leave blank if Doxygen is unavailable)
DOXYGEN := doxygen
# Once All dependency installed sucessfully
# than Now we start building OpenVDB
# download – openvdb_3_0_0_library.zip
cd /tmp
unzip openvdb_3_0_0_library.zip
cd openvdb
# COPY EDITED “Makefile” and overide existing
make -j4
make install
once everything is done successful you can see these three file in you build >> bin folder
In this video i will show you my another testing with arduino and Houdini.
This time i am using HC-SR04 ultra sonic sensor to get the data from real world and pass in Houdini parameter through custom Python Qt GUI.
Hello VFX Guys,
its time to play with some electronics circuits and connect to our software (Houdini, Maya, Nuke ,Realflow ) to receive and transmit real world data.
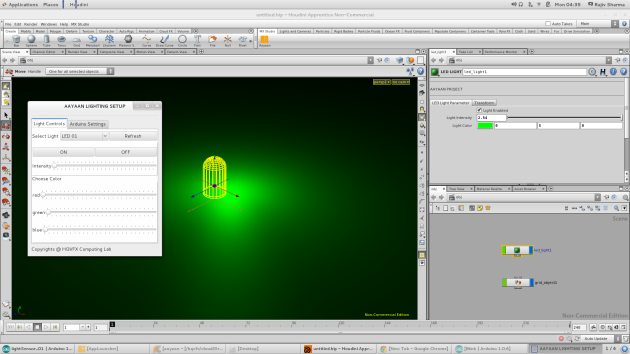
In this video I will show you my testing work of connect Houdini Light to real world light.
Check out the Video Attached Below:
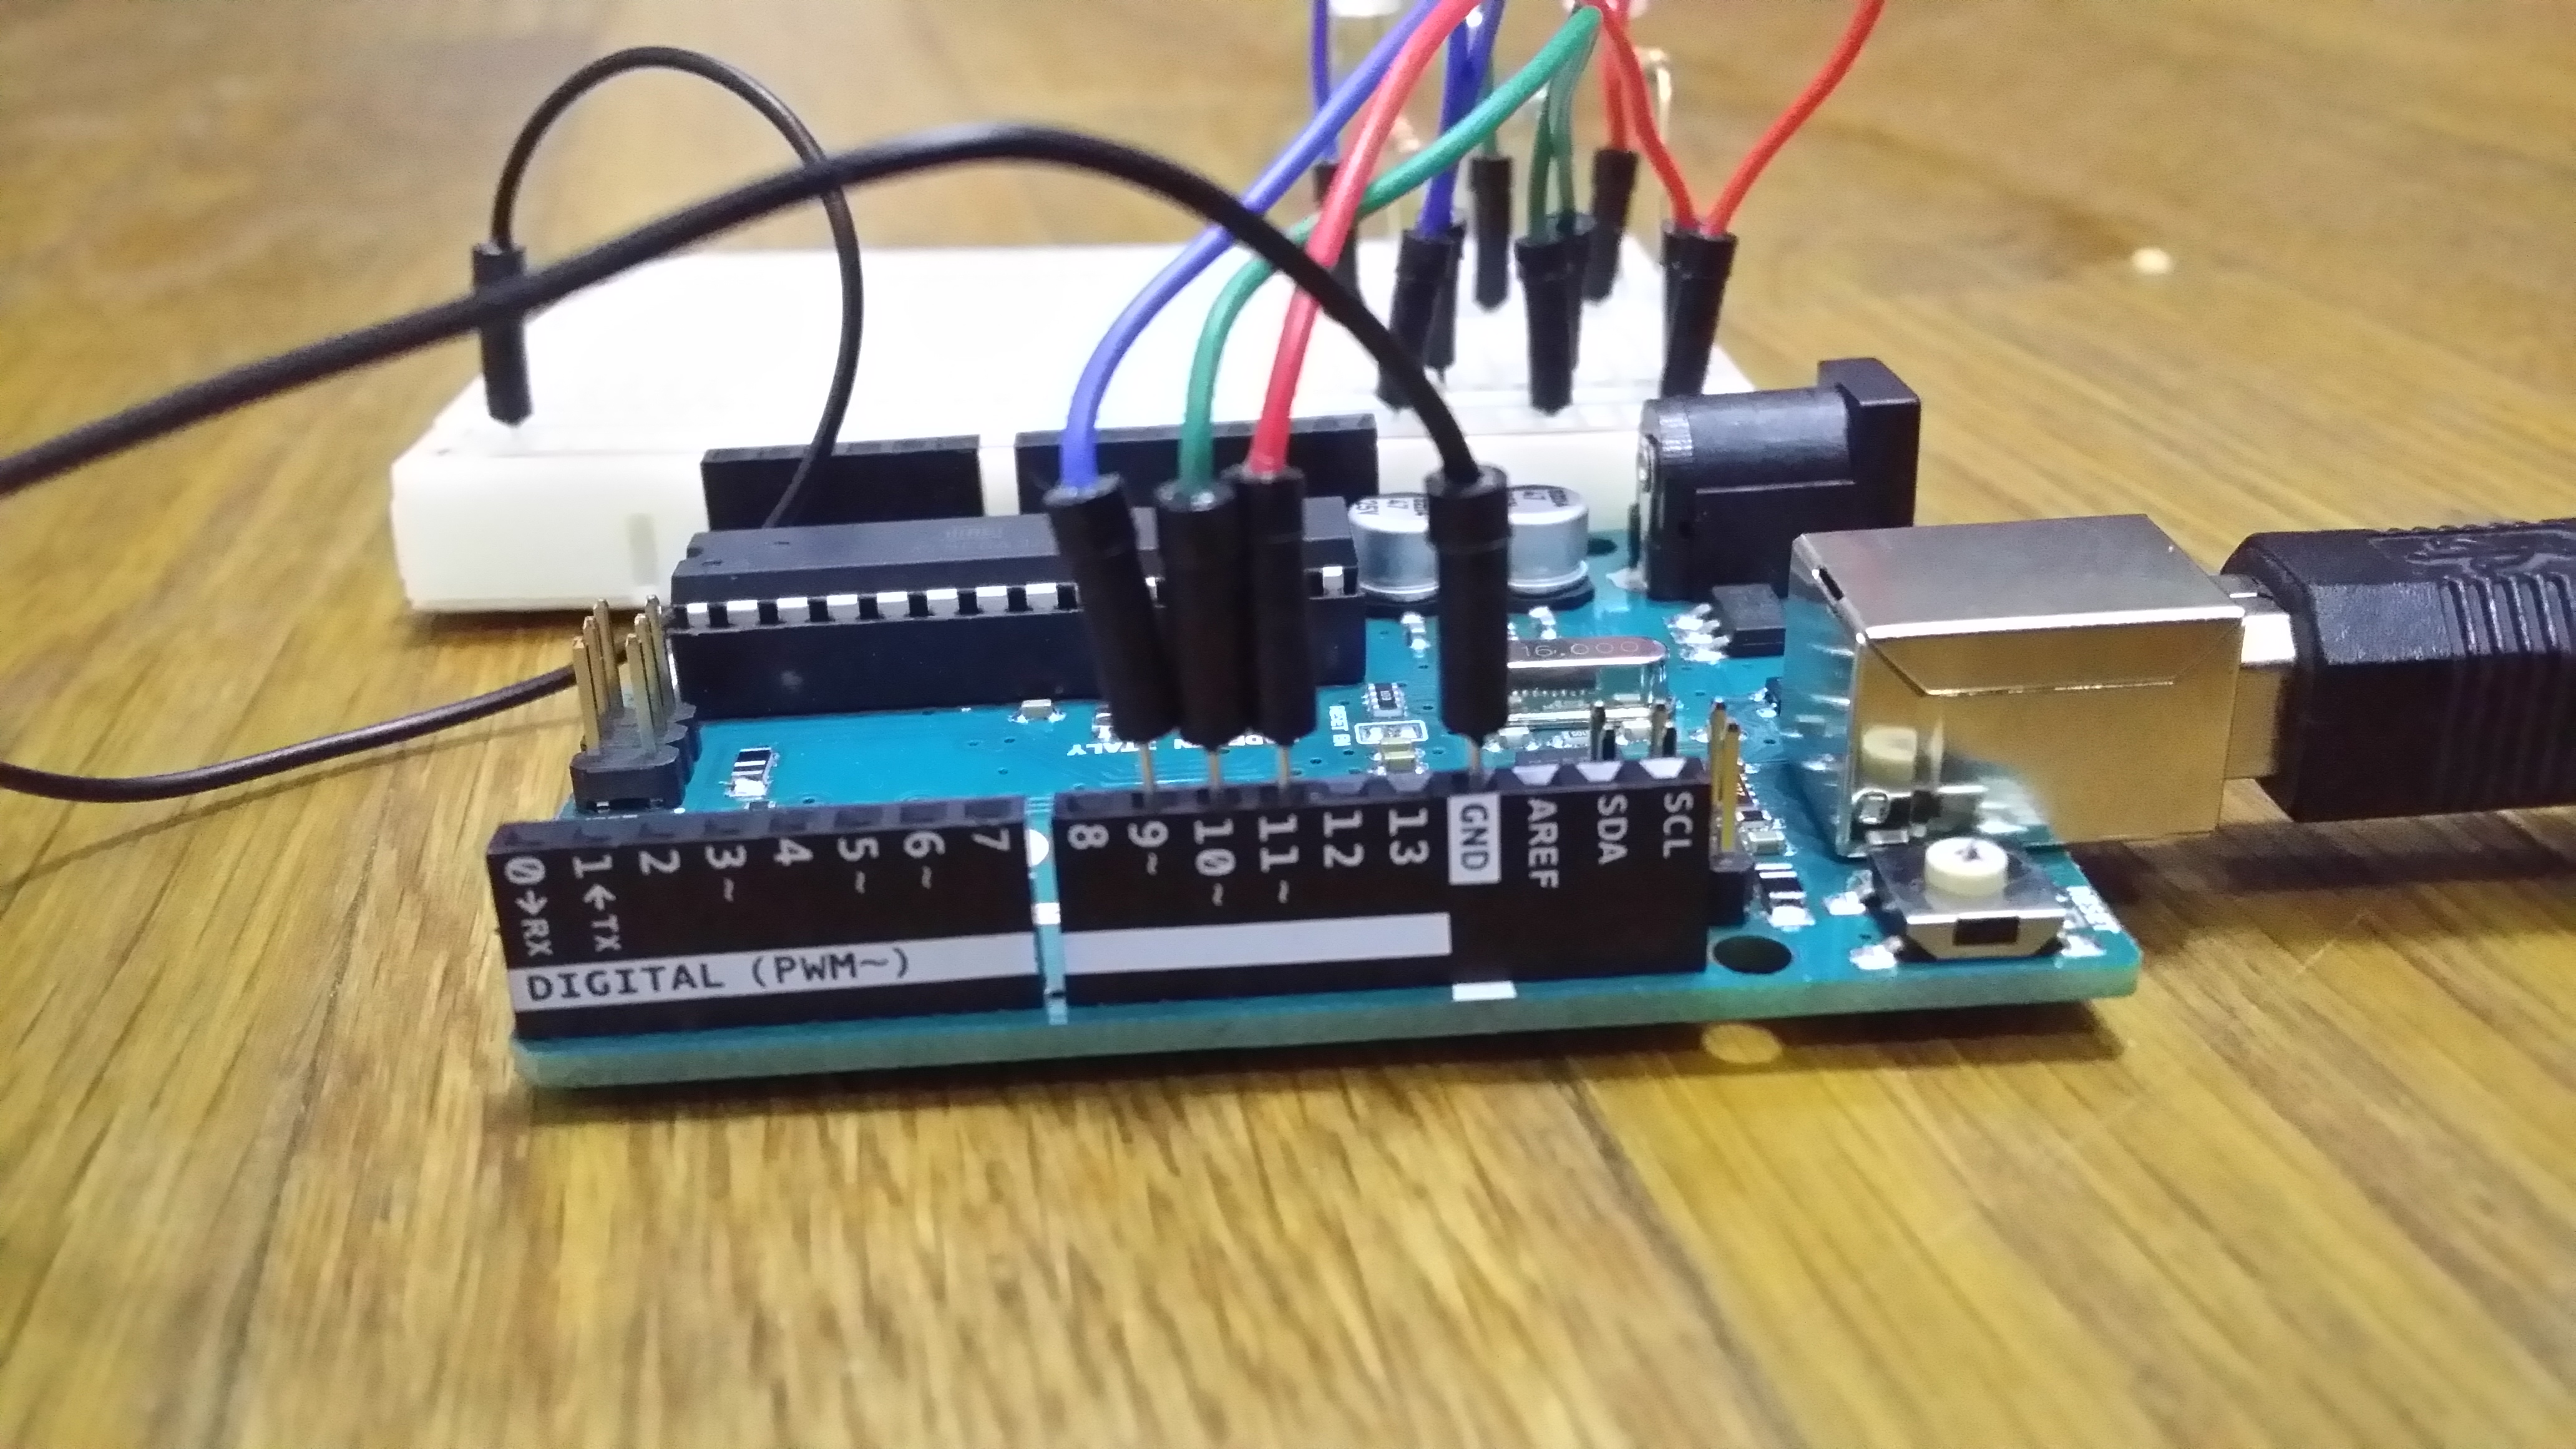
for this testing i have used following
Arduino UNO
3 LED
3 220 ohm resistor
Linux CentOS 7
Arduino IDE
Python 2.7.8
PyQt4
Houdini 13
mxstudio led otl
Houdini Object Model
In this post we start PyQt user interface widget toolkit to create a custom user interface inside Houdini.
Houdini does not distribute PyQt4, so if it is not installed you need to install it to your Python distribution.
Lets See How to install and setup Qt and PyQt4 in Linux Centos.
Check Houdini Python Paths
Run in your Terminal- env | grep houdini
Now Understand about python versions-
Centos 6.5 ship with python 2.6
and houdini 13 ship with python 2.6 and python 2.7
so if you have working python version installed in computer than houdini takes system python version.
else houdini will use HFS python versions.
to use Houdini Python versions
You can set HOUDINI_USE_HFS_PYTHON to 1 in houdini environment.
open file /home/rajiv/houdini13.0/houdini.env
add following line: HOUDINI_USE_HFS_PYTHON = 1
Now you can see python2.7.5 in python shell of houdini.
but no PyQt4 modules for houdini.
Python 2.7.5 (default, Oct 24 2013, 12:22:56)
[GCC 4.4.7 20120313 (Red Hat 4.4.7-1)] on linux2
Houdini 13.0.481 hou module imported.
Type “help”, “copyright”, “credits” or “license” for more information.
>>> import PyQt4
Traceback (most recent call last):
File “<console>”, line 1, in <module>
ImportError: No module named PyQt4
>>>
if in your system have python 2.7 with PyQt4 installed.
than you can add PyQt4 path (/usr/local/lib/python2.7/site_packages) in houdini sys.path
you may get following Error
ImportError: /usr/local/lib/python2.7/site-packages/PyQt4/_qt.so: undefined symbol: PyUnicodeUCS2_AsLatin1String
To Fix This Issue you should recompile PyQt against Hython (Houdini Python)
The Process of Compile PyQt for Houdini 13 on Centos 6.5
## Install SIP cd /tmp wget http://sourceforge.net/projects/pyqt/files/sip/sip-4.16.2/sip-4.16.2.tar.gz tar xvf sip-4.16.2.tar.gz cd sip-4.16.2 hython configure.py –bindir=/tmp/Houdini_PyQt/bin –destdir=/tmp/Houdini_PyQt/lib/python2.7 –incdir=/tmp/Houdini_PyQt/include/python2.7 –sipdir=/tmp/Houdini_PyQt/share/sip make make install
## Install PyQt4 cd /tmp wget http://sourceforge.net/projects/pyqt/files/PyQt4/PyQt-4.11.1/PyQt-x11-gpl-4.11.1.tar.gz tar xvf PyQt-x11-gpl-4.11.1.tar.gz cd PyQt-x11-gpl-4.11.1
## edit the configure.py and add the python command:
## sys.path.append(‘/tmp/Houdini_PyQt/lib/python2.7’) just before the line import sipconfig hython configure.py –bindir=/tmp/Houdini_PyQt/bin –destdir=/tmp/Houdini_PyQt/lib/python2.7 –plugin-destdir=/tmp/Houdini_PyQt/plugins –sipdir=/tmp/Houdini_PyQt/share/sip –assume-shared make make install
Now copy /tmp/Houdini_PyQt folder to common location and add “Houdini_PyQt/lib/python2.7” in sys.path and add in PYTHONPATH
To Test PyQt4 in Houdini go to shelh and create new tool and in scripts window copy following code:
“””
This Python Script will display Python and PyQt Version Installed in Houdini.
“””
import sys
path = ‘/Houdini_PyQt/lib/python2.7’ # Add Houdini PyQt path here
if not path in sys.path:
sys.path.append(path)
import getpass
import PyQt4
import PyQt4.pyqtconfig
from PyQt4 import QtGui
PYQTVERSION = PyQt4.pyqtconfig.Configuration().pyqt_version_str
USER = getpass.getuser()
PYTHONVERSION = sys.version
app = QtGui.QApplication(sys.argv)
QtGui.QMessageBox.information(None, ‘PyQt Information’, ‘Hello %s\nyour python version is %s\n\nyour PyQt version is %s’% (USER,PYTHONVERSION,PYQTVERSION))
The WordPress.com stats helper monkeys prepared a 2013 annual report for this blog.
Here’s an excerpt:
The Louvre Museum has 8.5 million visitors per year. This blog was viewed about 130,000 times in 2013. If it were an exhibit at the Louvre Museum, it would take about 6 days for that many people to see it.