Archive for the ‘FX Pipeline’ Category

Setup Arduino on CentOS 7

Posted: October 2, 2014 in Arduino, FX Pipeline

Setup Arduino on CentOS 7

arduino centos 02_com arduino centos 04_com arduino centos 06_com

Here I will Show you how you can start your Arduino on Linux CentOS 7.

First you need following:

1. Arduino device

2. USB Cable for Arduino

3. Arduino IDE – Free download from : http://arduino.cc/en/Main/Software

The RXTX that comes with Arduino was modified to support devices of the form /dev/ttyACM*, which are used by the Arduino Uno and Mega 2560 boards (which use an ATmega8U2 instead of an FTDI chip for USB-serial communication)
The RXTX library requires that you specify the serial ports.
Arduino’s (and other USB-serial devices) end up as /dev/ttyUSB# or /dev/ttyACM#.

when you start Arduino IDE first time you may see this error when upload code to device:

error message is: Serial port COM1 not found. Did you select the right one from the Tools > Serial Port menu?

And when you go to select the Serial Port, the option Tools > Serial Port is greyed out

So lets Fix this Error and start your Ardunio on CentOS 7

Plug your arduino, then from terminal:

# dmesg | tail
you will see something like (for arduino < UNO):
[rsharma@localhost ~]$ dmesg | tail
[ 1373.684427] wlo1: associate with 48:f8:b3:23:7c:b1 (try 1/3)
[ 1373.688116] wlo1: RX AssocResp from 48:f8:b3:23:7c:b1 (capab=0x411 status=0 aid=3)
[ 1373.691558] wlo1: associated
[ 1373.691583] IPv6: ADDRCONF(NETDEV_CHANGE): wlo1: link becomes ready
[ 2221.667753] usb 2-1.1: new full-speed USB device number 8 using ehci-pci
[ 2221.756669] usb 2-1.1: New USB device found, idVendor=2341, idProduct=0043
[ 2221.756682] usb 2-1.1: New USB device strings: Mfr=1, Product=2, SerialNumber=220
[ 2221.756688] usb 2-1.1: Manufacturer: Arduino (www.arduino.cc)
[ 2221.756693] usb 2-1.1: SerialNumber: 95237323934351606171
[ 2221.757248] cdc_acm 2-1.1:1.0: ttyACM0: USB ACM device
[rsharma@localhost ~]$
# lsusb
the output will be similar to this:
[rsharma@localhost ~]$ lsusb
Bus 001 Device 002: ID 8087:0024 Intel Corp. Integrated Rate Matching Hub
Bus 002 Device 002: ID 8087:0024 Intel Corp. Integrated Rate Matching Hub
Bus 001 Device 001: ID 1d6b:0002 Linux Foundation 2.0 root hub
Bus 002 Device 001: ID 1d6b:0002 Linux Foundation 2.0 root hub
Bus 003 Device 001: ID 1d6b:0002 Linux Foundation 2.0 root hub
Bus 004 Device 001: ID 1d6b:0003 Linux Foundation 3.0 root hub
Bus 001 Device 003: ID 138a:003c Validity Sensors, Inc. VFS471 Fingerprint Reader
Bus 002 Device 004: ID 04f2:b230 Chicony Electronics Co., Ltd Integrated HP HD Webcam
look for arduino or FTDI(if prior arduino UNO) write the two 4 digit ID: they are like 093a:2510
093a is the vendor ID
2510 is the product ID
# cd /etc/udev/rules.d/
# gedit 99-arduino.rules

// Add following lines in arduino rules file

for UNO
SUBSYSTEMS==”usb”, ATTRS{idProduct}==”XXXX”, ATTRS{idVendor}==”YYYY”, SYMLINK+=”ttyACM%n”
the others:
SUBSYSTEMS==”usb”, ATTRS{idProduct}==”XXXX”, ATTRS{idVendor}==”YYYY”, SYMLINK+=”ttyUSB%n”
# udevadm control –reload
reboot the system

SET THE PERMISSION

// Add user in Groups

# usermod -a -G uucp rsharma

# usermod -a -G lock rsharma

# usermod -a -G dialup rsharma

# ls -ld /run/lock

# cp /usr/lib/tmpfiles.d/legacy.conf /etc/tmpfiles.d/

# gedit /etc/tmpfiles.d/legacy.conf

change “d /run/lock 0775 root root – ” = to>>  “d /run/lock 0775 root lock – ”

# chmod o+rwx /run/lock

# ls -ld /var/lock

# chmod o+rwx /var/lock

Now Unplug and plug the Arduino device and Restart arduion IDE.

and you can see now Tools > Serial Port menu is activated.

just take a Quick test with your Device

// Copy this code in your IDE and upload to Micro controller

void setup() {
// initialize digital pin 13 as an output.
pinMode(13, OUTPUT);
}

// the loop function runs over and over again forever
void loop() {
digitalWrite(13, HIGH);   // turn the LED on (HIGH is the voltage level)
delay(1000);              // wait for a second
digitalWrite(13, LOW);    // turn the LED off by making the voltage LOW
delay(1000);              // wait for a second
}

arduino_centos


Houdini Flip Simulation – Hallway Flood Scene Tutorial

Free Tutorial Series by Rajiv Sharma, Technical Director

hallway_v004.120

Houdini_FX_workflow

In this Tutorial Series I will cover following:

Part01 – Export scene from Maya to Houdini
Part02 – understand alembic scene and prepare for simulations
Part03 – create flip simulation
Part04 – create foam, spray and bubbles
Part05 – export simulations in bGEO
Part06 – meshing of particles with VDB tools
Part07 – Photo realistic Texturing and Shading of Flip Scene
Part08 – Physically accurate Lighting setup
Part09 – Render passes from Houdini
Part10 – Compositing in Nuke

Checkout the VFX Pipeline Channel.

You can subscribe  to get updates of all Free Visual Effects Tutorials.

Introduction Video

Part01 – Export scene from Maya to Houdini

Part02 – Alembic Scene and Prepare for Texturing, Simulations, Animation and Rendering

Part03 – Set up Flip Simulation

Part04 – Create foam, spray and bubbles

Part05 – export simulations and and File Cache

Part06 – meshing of particles with VDB tools

Part07 – Photo realistic Texturing and Shading of Flip Scene

Part08 – Lighting Set up of Flip Scene

Part09 – Render Passes and Rendering of Flip Scene

Part10 – Composting of Render Passes in Nuke


houdini_playblast

Houdini Playblast Tool

This tool can be free download  from below link.


HoudiniPlayblastTool is a Develop for manage preview (Playblast) versions.
Feature of this tool :
1.Create preview and save automatically in proper location.
2.Maintain a complete list of saved playblast with version notes.
3.Version History window will display all versions.
4.Version History support multiple users.
5.from Version History You Can load any preview in mplay in a single click
6.This tool can also build movie(.mp4) if you turn on ‘Build Mov’.
7.Open Recent created preview
8.Add notes to versions
9.publish previews to publish location
10. publish multiple selected previews in asset location
11. display a complete history of preview publish
12. customize paths easily
13. choose player
14. Email Notification after playblast done

This tool is develop on Linux Centos 7,  Houdini 13, Python 2.7

Windows and mac users can use this tool but can not take advantages of few features.

 Release Date :  17 Sept 2014

download

ScreenShots

houdini playblast tool v0.1- 01

houdini playblast tool v0.1- 02

houdini playblast tool v0.1- 03

houdini playblast tool v0.1- 04

houdini playblast tool v0.1- 05


houdini_flip_tutorial

Houdini 13 Flip Fluid Simulation Tutorial.
PART 01
start with Houdini Flip particles shelf.
1. convert objects to liquid particles in Houdini
2. create water tank and interaction of rigid body in Houdini
3. create foam, spray, bubbles with water simulation in Houdini


h13

How to render image with motion blur In Houdini

In this video we will learn how to render image frame with motion blur in Houdini.
with examples:
Render character animation with motion blur in Houdini
Render rigid body fracture geometry with motion blur in Houdini
Render Particles effects with motion blur in Houdini


h13

Houdini FX – How To Emit and Generate Particles in Houdini

In this video we will learn how may types we can generate or emit particles in Houdini 13.
Particle Emit from Locator in Houdini 13
Particle Emit from Surface in Houdini 13
Particle Emit from Texture Map in Houdini 13


05. VFX Pipeline.


Darktable -Free and Open Source Color Correction Software for Linux.

darktable is an open source photography workflow application and RAW developer. A virtual lighttable and darkroom for photographers. It manages your digital negatives in a database, lets you view them through a zoomable lighttable and enables you to develop raw images and enhance them.


Asset Management and Production Tracking Software in VFX Pipeline.


first we will understand what is asset management software’s in vfx studios and how to do production tracking of 3d animation and visual effects projects.

and we will compare and view

Shotgun, Ftrack, and Open Source Tactic

SHOTGUN

pros-

well tested in production houses

ships with bridge tools -maya nuke ..etc

python api and open python codes developers

cons-

its not free


FTRACK

pros-

tested in production houses

customizable according to in-house pipeline

python api and Tutorials available at there website

cons-

its not free


TACTIC

pros-

Its Free and Open Source

Python, javascript, in built expressions

Good User Interface

good developer and user community and forums

cons-

Lack of Tutorials

not easy to set up

complex to customize


Check Out More in This Video


h13

Houdini in VFX Pipeline – Network View and Nodes


h13

Houdini in VFX Pipeline  – Introduction Houdini User Interface


qt-mainh13

In this post we start PyQt user interface widget toolkit to create a custom user interface inside Houdini.
Houdini does not distribute PyQt4, so if it is not installed you need to install it to your Python distribution.

Lets See How to install and setup Qt and PyQt4 in Linux Centos.

Check Houdini Python Paths
Run in your Terminal- env | grep houdini

Now Understand about python versions-
Centos 6.5 ship with python 2.6
and houdini 13 ship with python 2.6 and python 2.7
so if you have working python version installed in computer than houdini takes system python version.
else houdini will use HFS python versions.

to use Houdini Python versions
You can set HOUDINI_USE_HFS_PYTHON to 1 in houdini environment.
open file /home/rajiv/houdini13.0/houdini.env
add following line:
HOUDINI_USE_HFS_PYTHON = 1

Now you can see python2.7.5 in python shell of houdini.
but no PyQt4 modules for houdini.

Python 2.7.5 (default, Oct 24 2013, 12:22:56)
[GCC 4.4.7 20120313 (Red Hat 4.4.7-1)] on linux2
Houdini 13.0.481 hou module imported.
Type “help”, “copyright”, “credits” or “license” for more information.
>>> import PyQt4
Traceback (most recent call last):
File “<console>”, line 1, in <module>
ImportError: No module named PyQt4
>>>

if in your system have python 2.7 with PyQt4 installed.
than you can add PyQt4 path (/usr/local/lib/python2.7/site_packages) in houdini sys.path
you may get following Error
ImportError: /usr/local/lib/python2.7/site-packages/PyQt4/_qt.so: undefined symbol: PyUnicodeUCS2_AsLatin1String

To Fix This Issue you should recompile PyQt against Hython (Houdini Python)

The Process of Compile PyQt for Houdini 13 on Centos 6.5

## Create Folder Structure
mkdir /tmp/Houdini_PyQt
mkdir -p /tmp/Houdini_PyQt/{bin,include,include/python2.7,lib,lib/python2.7,plugins,share,share/sip}

## Install QT
cd /tmp
wget http://download.qt-project.org/official_releases/qt/4.8/4.8.6/qt-everywhere-opensource-src-4.8.6.tar.gz
tar xvf qt-everywhere-opensource-src-4.8.6.tar.gz
cd qt-everywhere-opensource-src-4.8.6
./configure
make
make install
PATH=/usr/local/Trolltech/Qt-4.8.6/bin:$PATH
export PATH

## Install SIP
cd /tmp
wget http://sourceforge.net/projects/pyqt/files/sip/sip-4.16.2/sip-4.16.2.tar.gz
tar xvf sip-4.16.2.tar.gz
cd sip-4.16.2
hython configure.py –bindir=/tmp/Houdini_PyQt/bin –destdir=/tmp/Houdini_PyQt/lib/python2.7 –incdir=/tmp/Houdini_PyQt/include/python2.7 –sipdir=/tmp/Houdini_PyQt/share/sip
make
make install

## Install PyQt4
cd /tmp
wget http://sourceforge.net/projects/pyqt/files/PyQt4/PyQt-4.11.1/PyQt-x11-gpl-4.11.1.tar.gz
tar xvf PyQt-x11-gpl-4.11.1.tar.gz
cd PyQt-x11-gpl-4.11.1
## edit the configure.py and add the python command:
## sys.path.append(‘/tmp/Houdini_PyQt/lib/python2.7’) just before the line import sipconfig
hython configure.py –bindir=/tmp/Houdini_PyQt/bin –destdir=/tmp/Houdini_PyQt/lib/python2.7 –plugin-destdir=/tmp/Houdini_PyQt/plugins –sipdir=/tmp/Houdini_PyQt/share/sip –assume-shared
make
make install


Now copy /tmp/Houdini_PyQt folder to common location and add “Houdini_PyQt/lib/python2.7” in sys.path and add in PYTHONPATH

To Test PyQt4 in Houdini go to shelh and create new tool and in scripts window copy following code:

#================================================================================================================================================================================#

“””
This Python Script will display Python and PyQt Version Installed in Houdini.
“””
import sys
path = ‘/Houdini_PyQt/lib/python2.7’ # Add Houdini PyQt path here
if not path in sys.path:
sys.path.append(path)

import getpass
import PyQt4
import PyQt4.pyqtconfig
from PyQt4 import QtGui

PYQTVERSION = PyQt4.pyqtconfig.Configuration().pyqt_version_str
USER = getpass.getuser()
PYTHONVERSION = sys.version

app = QtGui.QApplication(sys.argv)
QtGui.QMessageBox.information(None, ‘PyQt Information’, ‘Hello %s\nyour python version is %s\n\nyour PyQt version is %s’% (USER,PYTHONVERSION,PYQTVERSION))

#================================================================================================================================================================================#

Now you are ready to drive with PyQt Gui Framework inside Houdini

houdini_PyQt4_001


CinePaint: Open source deep paint software
http://www.cinepaint.org/

Top Reasons to Use CinePaint

Support for 8-bit, 16-bit and 32-bit color channels of deep paint.

High fidelity image file types such as DPX, OpenEXR and 16-bit TIFF. These files can’t be opened in ordinary 8-bit image applications without crushing them.

High Dynamic Range. HDR images can go brighter than white. Ordinary images can’t be brighter than a white sheet of paper (0=black, 1.0=white).

Gallery-quality printing. B&W photographs have only one color channel and degrade quickly when manipulated as 8-bit images.CinePaint has higher fidelity and offers a 16-bit printing path to the print-head using GutenPrint.

Color Management System. CinePaint uses LittleCMS.

Flipbook. Movie playback of short sequences of images in RAM.

Innovation. CinePaint offers features that go beyond ordinary painting tools.

It’s used to make feature films at major studios.

Open Source. With various OSS licenses, because it uses code from various sources, including GPL, LGPL, BSD, and MPL.

Free.

Friendly professional developers. Polite discussion forums.

Being a CinePaint developer can be a good career move. CinePaint developers have gotten jobs at companies such as DreamWorks Animation,Sony Pictures Imageworks, and Apple.

Install cinepaint on Centos
Build and Install from source tarball

yum install lcms-devel libtiff-devel libpng-devel libjpeg-devel openexr-devel fltk-devel gutenprint-devel libXmu-devel

download latest version of Cinepaint from
http://sourceforge.net/projects/cinepaint/files/CinePaint/

#### Extract file
tar xvfz cinepaint.X.X.tgz
cd cinepaint

./configure
make
make install

### to start Cinepaint

cinepaint

you may get following message:
cinepaint: error while loading shared libraries: libcinepaint.so.1:
cannot open shared object file: No such file or directory

You need to run ldconfig after the install so that the
system can find the new libraries.

Just open a terminal and run:

ldconfig

Cheers


MX Studio Developer Console v0.1
Design for Pipeline Developers

A Quick Introduction of GUI


Add new application into existing pipeline need to follow of regular steps.
developer console will handle All necessary steps to plug-in or plug-out applications in existing pipeline

this application will primary work as remote control of vfx pipeline.

Features of this application:
● Create all initial files and folders for new Application
● Sort out all Applications for Easy Explore
● Contain information of all application and Scripts
● Release Application for UAT or End User
● Deactivate Application for End User
● Add New Version
● Handle Application Version Naming Convention
● Maintain All Applications information in MySQL Database
● Integrated email Notification System
● Integrated Git and Redmine
● automatically add tickets and update status when things will move on Redmine
● create Git Branches user can checkout branches with remote repository and merge automatically
● Integrated Git and Redmine
● Add or Edit Environment Variable


firefox java

Install Firefox on linux centos 6.4

wget Uvh http://download.fedoraproject.org/pub/epel/6/i386/epel-release-6-8.noarch.rpm

rpm -Uvh epel-release-6-8.noarch.rpm

yum install firefox


Install Java runtime environment plugin for Firefox on Linux CentOS 6.4

download latest version of java from :  http://www.java.com/en/download/linux_manual.jsp?locale=en

file name –   Linux x64 RPM

(Go to download location ) –  cd /home/rajiv/Downloads

[root@elitebook Downloads]# rpm -Uvh jre-7u45-linux-x64.rpm
Preparing…                ########################################### [100%]
1:jre                    ########################################### [100%]

Unpacking JAR files…
rt.jar…
jsse.jar…
charsets.jar…
localedata.jar…
jfxrt.jar…

[root@elitebook Downloads]#
[root@elitebook Downloads]# cd /usr/lib64/mozilla/plugins
[root@elitebook plugins]# ln -fs /usr/java/jre1.7.0_45/lib/amd64/libnpjp2.so libnpjp2.so
[root@elitebook plugins]# firefox http://java.com/en/download/testjava.jsp

firefox_java_centos


qt-main

install Qt5 on CentOS 6.4 and fix GLIBCXX_3.4.15 not found error in QT5 install

download online installer from : http://download.qt-project.org/official_releases/online_installers/1.4/qt-linux-opensource-1.4.0-2-x86_64-online.run

execute this run file as root

this will download and install qt5 in your system

But when you start Qt5 application this Error will come in centos

[rajiv@elitebook ~]$ cd /opt/Qt5/Tools/QtCreator/bin
[rajiv@elitebook bin]$ ./qtcreator
Failed to load core: /opt/Qt5/Tools/QtCreator/lib/qtcreator/plugins/QtProject/libCore.so: Cannot load library /opt/Qt5/Tools/QtCreator/lib/qtcreator/plugins/QtProject/libCore.so: (/usr/lib64/libstdc++.so.6: version `GLIBCXX_3.4.15′ not found (required by /opt/Qt5/Tools/QtCreator/lib/qtcreator/plugins/QtProject/../.././libQt5CLucene.so.5))


To Fix This Error:-

You need to install the glibc-devel package

yum -y install glibc-devel.i686 glibc-devel

download gcc4.6.2 from : http://ftp.gnu.org/gnu/gcc/gcc-4.6.2/gcc-4.6.2.tar.gz

Go to Terminal as root

tar xzf gcc-4.6.2.tar.gz
cd gcc-4.6.2
./contrib/download_prerequisites
cd ..
mkdir objdir
cd objdir
$PWD/../gcc-4.6.2/configure –prefix=/opt/gcc-4.6.2
make
make install

mv /usr/lib64/libstdc++.so.6 /usr/lib64/libstdc++.so.6.backup

cp /opt/gcc-4.6.2/lib64/libstdc++.so.6 /usr/lib64

cp /opt/gcc-4.6.2/lib64/libstdc++.so.6.0.16 /usr/lib64


Git-Logo

How to install git 2.1.0 and git client on linux centOS 7 / RHEL7

first check git version on centOS or red Hat
[rajiv@elitebook home]# git –version
git version 1.8.1

yum install gettext-devel expat-devel curl-devel zlib-devel openssl-devel
cd /tmp
wget https://www.kernel.org/pub/software/scm/git/git-2.1.0.tar.gz
tar xzvf git-2.1.0.tar.gz
cd git-2.1.0
make prefix=/opt/git all
make prefix=/opt/git install
export PATH=”/opt/git/bin:$PATH”

[rajiv@elitebook home]# git –version
git version 2.1.0

for installation of git client on centos you can check out this post on my blog:
https://rajivpandit.wordpress.com/2013/08/04/rabbitvcs-subversion-client-for-linux-centos-6-4-rhel6/


you can also check GitEye

ColalbNet-GitEye

This free desktop app combines a simple-to-use graphical Git client with central visibility into essential developer tasks such as defect tracking, agile planning, code reviews and build services.

http://www.collab.net/giteyeapp

https://www.kernel.org/pub/software/scm/git/git-2.1.0.tar.gz


Thats It

Cheers


Python

email

How to send Email by Python

Following are the two ways to send email notifications by python

“””
This Script Will Send Email Using Internal Email System

In this no need any authentication or password required to send Email

Python Version 2.6

“””

from email.mime.text import MIMEText
import email.Utils
import smtplib

emailList = [“recepient1@gmail.com”, “recepient2@gmail.com”] # this is List of Email Ids

for emailID in emailList:
try:
print “Sending email to … “, emailID

FROM = “email@gmail.com”
TO = emailID
message = “This Email is send by Python\n Python is Great !!!”
msg = MIMEText(message)
msg[“Subject”] = “Email Notification by Python”
msg[“Message-id”] = email.Utils.make_msgid()
msg[“From”] = FROM
msg[“To”] = TO
host = “smtp.gmail.com”
server = smtplib.SMTP(host)
server.sendmail(FROM, TO, msg.as_string())
server.quit()
print “Email Send”

except Exception, e:
print e


“””

This Script Will Send Email Using Gmail

This Required Username and password

Python Version 2.6

“””

from email.mime.text import MIMEText
from datetime import date
import smtplib

SMTP_SERVER = “smtp.gmail.com”
SMTP_PORT = 587
SMTP_USERNAME = “email@gmail.com”
SMTP_PASSWORD = “password”

EMAIL_TO = [“recepient1@gmail.com”, “recepient2@gmail.com”]
EMAIL_FROM = “email@gmail.com”
EMAIL_SUBJECT = “Demo Email : “

DATE_FORMAT = “%d/%m/%Y”
EMAIL_SPACE = “, “

DATA=’This is the content of the email.’

def send_email():
msg = MIMEText(DATA)
msg[‘Subject’] = EMAIL_SUBJECT + ” %s” % (date.today().strftime(DATE_FORMAT))
msg[‘To’] = EMAIL_SPACE.join(EMAIL_TO)
msg[‘From’] = EMAIL_FROM
mail = smtplib.SMTP(SMTP_SERVER, SMTP_PORT)
mail.starttls()
mail.login(SMTP_USERNAME, SMTP_PASSWORD)
mail.sendmail(EMAIL_FROM, EMAIL_TO, msg.as_string())
mail.quit()
print “Email Send”

if __name__==’__main__’:
send_email()


gimp-splash-original

How to install GIMP 2.8 on CentOS 6.4 / RHEL6

centos and red hat linux os have GIMP 2.6 installed by default.
GIMP 2.8 is an another important release from a development point of view, even more that it was for 2.6. It features a big change to the user interface addressing one of the most often received complain: the lack of a single window mode. Moreover the integration effort of GEGL library had taken a big step forward, reaching more than 90% of the GIMP core, a new powerful transformation tool, layer groups, new common options, new brushes, improved text tool, and more

the GIMP 2.8 is the latest version of gimp which include following great features:-

http://docs.gimp.org/2.8/en/gimp-introduction-whats-new.html
Lets install GIMP 2.8 in centOS 6.4

first install required packages:

yum install -y aalib aalib-devel libexif-devel libjpeg-devel libpng-devel
yum install -y libtiff-devel libmng-devel libXpm-devel librsvg-devel libwmf-devel
yum install -y libffi-devel webkitgtk-devel python-devel zlib-devel pygtk2-devel

Download Following Packages:

gimp-2.8.6
ftp://ftp.gimp.org/pub/gimp/v2.8/gimp-2.8.6.tar.bz2

glib-2.34.0
http://ftp.acc.umu.se/pub/GNOME/sources/glib/2.34/glib-2.34.0.tar.xz

babl-0.1.10
ftp://ftp.gimp.org/pub/babl/0.1/babl-0.1.10.tar.bz2

gegl-0.2.0
ftp://ftp.gimp.org/pub/gegl/0.2/gegl-0.2.0.tar.bz2

atk-2.2.0
http://download.gnome.org/sources/atk/2.2/atk-2.2.0.tar.bz2

cairo-1.12.16
http://cairographics.org/releases/cairo-1.12.16.tar.xz

pango-1.29.4
http://ftp.gnome.org/pub/gnome/sources/pango/1.29/pango-1.29.4.tar.bz2

gdk-pixbuf-2.24.1
http://ftp.gnome.org/pub/gnome/sources/gdk-pixbuf/2.24/gdk-pixbuf-2.24.1.tar.xz

gtk+-2.24.10
http://ftp.gnome.org/pub/gnome/sources/gtk+/2.24/gtk+-2.24.10.tar.xz


download and extract above 9 packages and copy to /opt


go to terminal with root and copy Following Code :-

############################################################

mkdir /opt/gimp2.8

cd /opt/babl-0.1.10
./configure –prefix=/opt/gimp2.8
make
make install

cd /opt/glib-2.34.0
./configure –prefix=/opt/gimp2.8
make
make install

cd /opt/gegl-0.2.0
export PKG_CONFIG_PATH=/opt/gimp2.8/lib/pkgconfig
export LD_LIBRARY_PATH=/opt/gimp2.8/lib
mkdir /opt/gegl
mkdir /opt/gegl/buffer
mkdir /opt/gegl/buffer/babl
cp -p /opt/gimp2.8/include/babl-0.1/babl/*.h /opt/gegl/buffer/babl/
./configure –prefix=/opt/gimp2.8
make
make install

cd /opt/atk-2.2.0
./configure –prefix=/opt/gimp2.8
make
make install

cd /opt/cairo-1.12.16
./configure –prefix=/opt/gimp2.8
make
make install

cd /opt/pango-1.29.4
./configure –prefix=/opt/gimp2.8
make
make install

cd /opt/gdk-pixbuf-2.24.1
./configure –prefix=/opt/gimp2.8
make
make install

cd /opt/gtk+-2.24.10
export LD_LIBRARY_PATH=/opt/gimp2.8/lib
export PKG_CONFIG_PATH=/opt/gimp2.8/lib/pkgconfig
./configure –prefix=/opt/gimp2.8
make
make install

cd /opt/gimp-2.8.6
export LD_LIBRARY_PATH=/opt/gimp2.8/lib
export PKG_CONFIG_PATH=/opt/gimp2.8/lib/pkgconfig
./configure –prefix=/opt/gimp2.8
make
make install

/opt/gimp2.8/bin/gimp-2.8

############################################################


It Will Take approximate (30-40 Minutes to compile)

After Compile

go to terminal and enter

/opt/gimp2.8/bin/gimp-2.8


final_GIMP2.8
Thats It !!!

Cheers


Get started with the world’s most powerful open source asset management tool: TACTIC

tactic4.0

download from : http://community.southpawtech.com/downloads
Enterprise version (Latest TACTIC development release) 4.0.0.rc02
and
download TACTIC EPL License

Requirements:-
TACTIC requires the following software to be installed:

  • Apache HTTP server 2.2
  • Postgres Database Server 8.4 or higher
  • Python 2.6 or 2.7 with the following Python modules:
  • Python Imaging Library 1.1.7
  • Python lxml 2.3.5
  • Pycrypto 2.3
  • Psycopg2 2.4.6

Lets Start Install and configure TACTIC 4.0.0.rc02 on CentOS 6.4 /RHEL

Disabling Security for Testing
For the sake of getting Tactic up quickly without a large amount of fuss, it is prudent to disable firewalling and SELinux. This is by no means an endorsement to run your server without these services. Once you have Tactic up and running we encourage you to read the section <TACTIC SECURITY>.
CentOS 6.4 uses the iptables service as a firewall. To disable this temporarily you can issue the following commands as root.
/etc/init.d/iptables save
/etc/init.d/iptables stop
This will disable the firewall for the currently running CentOS session. Should you wish these settings to persist across reboots. You can issue the following command as root.
/sbin/chkconfig iptables off
To disable SELinux, edit the file /etc/selinux/config as root with your favourite editor and set the SELINUX variable to ‘disabled’.
SELINUX=disabled
Getting this setting to take effect requires a reboot.

  • Installing Apache HTTP server

yum install httpd
/etc/init.d/httpd start
/sbin/chkconfig httpd on

  • Installing Postgres Database Server

rpm -qva | grep -i postgres

  • Remove existing Postgres

rpm -e <package_name>

gedit /etc/yum.repos.d/CentOS-Base.repo
include the line under both the [base] section and the [updates] section of the file.
exclude=postgresql*

rpm -Uvh http://yum.postgresql.org/9.2/redhat/rhel-6-x86_64/pgdg-centos92-9.2-6.noarch.rpm

yum install postgresql postgresql-server postgresql-contrib postgresql-devel
yum install postgresql*
yum install postgresql-libs
su – postgres -c /usr/pgsql-9.2/bin/initdb
service postgresql-9.2 initdb
service postgresql-9.2 start
/etc/init.d/postgresql-9.2 start

netstat -nutlap | grep post
chkconfig –levels 235 postgresql-9.2 on


  • Install ImageMagick (Image Manipulation) Tool on RHEL/CentOS

You need to install the command line version of imagemagick.

The basic PIL module in python may not be able to process more complex image formats. Like some special png or 32 bit tiffs.

yum install ImageMagick


  • Install Python2.7 in CentOS 6.4

yum groupinstall “Development tools”
yum install gcc zlib-devel libxslt-devel libxml2-devel
yum install zlib-devel
yum install bzip2-devel
yum install openssl-devel
yum install ncurses-devel
yum install python-devel

cd /opt
wget http://www.python.org/ftp/python/2.7.3/Python-2.7.3.tar.bz2
tar xf Python-2.7.3.tar.bz2
cd Python-2.7.3
./configure –prefix=/usr/local
make && make altinstall

export LD_LIBRARY_PATH=/usr/local/lib/python2.7

  • Installing Python Modules

-Installing lxml 2.3.5
cd /tmp
wget http://lxml.de/files/lxml-2.3.5.tgz
tar -zxvf lxml-2.3.5.tgz
cd lxml-2.3.5
/usr/local/bin/python2.7 setup.py install

-Installing Python Imaging Library 1.1.7
cd /tmp
wget http://effbot.org/downloads/Imaging-1.1.7.tar.gz
tar -zxvf Imaging-1.1.7.tar.gz
cd Imaging-1.1.7
/usr/local/bin/python2.7 setup.py install

-Installing Pycrypto 2.3
cd /tmp
wget http://pypi.python.org/packages/source/p/pycrypto/pycrypto-2.3.tar.gz
tar -zxvf pycrypto-2.3.tar.gz
cd pycrypto-2.3
/usr/local/bin/python2.7 setup.py install

-Installing Psycopg2 2.4.6
cd /tmp
wget http://initd.org/psycopg/tarballs/PSYCOPG-2-4/psycopg2-2.4.6.tar.gz
tar -zxvf psycopg2-2.4.6.tar.gz
cd psycopg2-2.4.6

gedit /tmp/psycopg2-2.4.6/setup.cfg
edit the pg_config entry to match the following:
pg_config=/usr/pgsql-9.2/bin/pg_config

/usr/local/bin/python2.7 setup.py install

Test Every Module is working fine :-
/usr/local/bin/python2.7

import psycopg2
import Crypto
import lxml
import PIL

It should be like that
[root@elitebook rajiv]# /usr/local/bin/python2.7
Python 2.7.3 (default, Aug 15 2013, 23:59:03)
[GCC 4.4.7 20120313 (Red Hat 4.4.7-3)] on linux2
Type “help”, “copyright”, “credits” or “license” for more information.
>>> import psycopg2
>>> import Crypto
>>> import lxml
>>> import PIL
>>>

  • Installing Tactic 4.0.0.rc02

cd /tmp
unzip tactic-4.0.0.rc02.zip

Before we run the Tactic installer, we must further configure Postgres to ensure proper installation of Tactic.
Configuring Postgres

service postgresql-9.2 stop
mv /var/lib/pgsql/9.2/data/pg_hba.conf /var/lib/pgsql/9.2/data/pg_hba.conf.INSTALL
cp /tmp/tactic-4.0.0.rc02/src/install/postgresql/pg_hba.conf /var/lib/pgsql/9.2/data/pg_hba.conf
chown postgres:postgres /var/lib/pgsql/9.2/data/pg_hba.conf
service postgresql-9.2 start

psql -U postgres template1

This command should fire up a prompt like this:
template1=#
Type \q to exit

/usr/local/bin/python2.7 /tmp/tactic-4.0.0.rc02/src/install/install.py

The installer will ask you a number of questions. You should be prompted by the following:
Please enter the base path of the TACTIC installation:
(/home/apache) -> /opt/tactic

get httpd users
ps -ef | grep httpd

Please enter the user Apache Web Server is run under:
(apache) ->apache

  • -Configuring Apache

Lastly Tactic requires us to install the custom Apache configuration file it has created during the installation process. As root issue the following commands:
cp /opt/tactic/tactic_data/config/tactic.conf /etc/httpd/conf.d

To test this we should first verify that /etc/httpd/conf.d is an included module path in the main Apache configuration file. As root issue the following command:
cat /etc/httpd/conf/httpd.conf | grep conf.d

If you receive the following as output we have installed the Tactic Apache configuration file correctly.
Include conf.d/*.conf

edit /var/www/html/index.html
Add only the following line:
<META http-equiv=”refresh” content=”0;URL=/tactic”>

Restart the Apache service to make sure the configuration hasn’t caused any problems
/etc/init.d/httpd restart

Lastly we need to ensure that the Apache server has loaded the modules needed for proxying and load balancing the Tactic service
/usr/sbin/httpd -t -D DUMP_MODULES

In the resulting output look for the following modules:
[root@elitebook rajiv]# /usr/sbin/httpd -t -D DUMP_MODULES
Loaded Modules:
core_module (static)
mpm_prefork_module (static)
http_module (static)
so_module (static)
auth_basic_module (shared)
auth_digest_module (shared)
authn_file_module (shared)
authn_alias_module (shared)
authn_anon_module (shared)
authn_dbm_module (shared)
authn_default_module (shared)
authz_host_module (shared)
authz_user_module (shared)
authz_owner_module (shared)
authz_groupfile_module (shared)
authz_dbm_module (shared)
authz_default_module (shared)
ldap_module (shared)
authnz_ldap_module (shared)
include_module (shared)
log_config_module (shared)
logio_module (shared)
env_module (shared)
ext_filter_module (shared)
mime_magic_module (shared)
expires_module (shared)
deflate_module (shared)
headers_module (shared)
usertrack_module (shared)
setenvif_module (shared)
mime_module (shared)
dav_module (shared)
status_module (shared)
autoindex_module (shared)
info_module (shared)
dav_fs_module (shared)
vhost_alias_module (shared)
negotiation_module (shared)
dir_module (shared)
actions_module (shared)
speling_module (shared)
userdir_module (shared)
alias_module (shared)
substitute_module (shared)
rewrite_module (shared)
proxy_module (shared)
proxy_balancer_module (shared)
proxy_ftp_module (shared)
proxy_http_module (shared)
proxy_ajp_module (shared)
proxy_connect_module (shared)
cache_module (shared)
suexec_module (shared)
disk_cache_module (shared)
cgi_module (shared)
version_module (shared)
dnssd_module (shared)
php5_module (shared)
dav_svn_module (shared)
authz_svn_module (shared)
Syntax OK
[root@elitebook rajiv]#

  • – Add Python 2.7 in Tactic Configuration :-

gedit /opt/tactic/tactic_data/config/tactic-conf.xml
Find the following line:
<python>python</python>
And replace it with:
<python>/usr/local/bin/python2.7</python>

  • – Add PYTHONPATH in Tactic

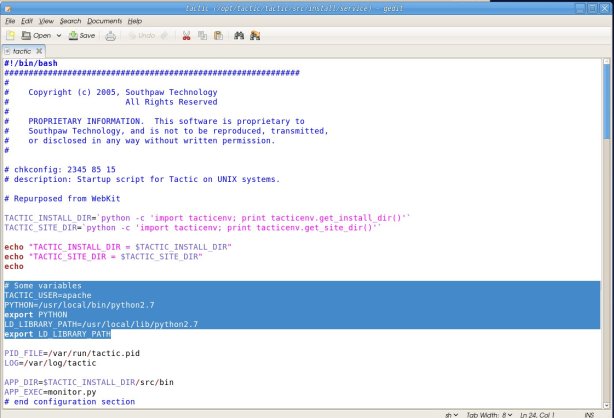
gedit /opt/tactic/tactic/src/install/service/tactic

Add these Lines:-

PYTHON=/usr/local/bin/python2.7
export PYTHON
LD_LIBRARY_PATH=/usr/local/lib/python2.7
export LD_LIBRARY_PATH

pythonpath

  • Starting Tactic

su apache -s /bin/bash -c “/usr/local/bin/python2.7 /opt/tactic/tactic/src/bin/startup_dev.py”

You should now be able to navigate a web browser to
http://localhost/tactic/admin

TACTIC defines an administrative user by default. The login information is:
Username: admin, Password: (set it on your first login)

tactic_login


qt-main

Install qtwebkit for PyQt4 in Linux CentOS 6.4 (RHEL)

Go To Terminal (with root)

[root@elitebook rajiv]# yum install PyQt4
Loaded plugins: fastestmirror, refresh-packagekit, security
Loading mirror speeds from cached hostfile
* base: centos.aol.in
* elrepo: elrepo.org
* epel: ftp.ps.pl
* extras: centos.aol.in
* remi: fr2.rpmfind.net
* rpmforge: apt.sw.be
* updates: centos-hn.viettelidc.com.vn
Setting up Install Process
Package PyQt4-4.6.2-9.el6.x86_64 already installed and latest version
Nothing to do
[root@elitebook rajiv]#

[root@elitebook rajiv]# yum –nogpgcheck install PyQt4-web*
Loaded plugins: fastestmirror, refresh-packagekit, security
Loading mirror speeds from cached hostfile
* base: centos.aol.in
* elrepo: elrepo.org
* epel: ftp.ps.pl
* extras: centos.aol.in
* remi: fr2.rpmfind.net
* rpmforge: apt.sw.be
* updates: centos-hn.viettelidc.com.vn
Setting up Install Process
Resolving Dependencies
–> Running transaction check
—> Package PyQt4-webkit.x86_64 0:4.6.2-8.el6 will be installed
—> Package PyQt4-webkit-devel.x86_64 0:4.6.2-8.el6 will be installed
–> Processing Dependency: sip-devel for package: PyQt4-webkit-devel-4.6.2-8.el6.x86_64
–> Processing Dependency: PyQt4-devel for package: PyQt4-webkit-devel-4.6.2-8.el6.x86_64
–> Running transaction check
—> Package PyQt4-devel.x86_64 0:4.6.2-9.el6 will be installed
—> Package sip-devel.x86_64 0:4.9.3-1.el6 will be installed
–> Finished Dependency Resolution

Dependencies Resolved

================================================================================
Package Arch Version Repository Size
================================================================================
Installing:
PyQt4-webkit x86_64 4.6.2-8.el6 epel 85 k
PyQt4-webkit-devel x86_64 4.6.2-8.el6 epel 11 k
Installing for dependencies:
PyQt4-devel x86_64 4.6.2-9.el6 base 6.6 M
sip-devel x86_64 4.9.3-1.el6 base 128 k

Transaction Summary
================================================================================
Install 4 Package(s)

Total download size: 6.9 M
Installed size: 22 M
Is this ok [y/N]: y
Downloading Packages:
(1/4): PyQt4-devel-4.6.2-9.el6.x86_64.rpm | 6.6 MB 00:47
(2/4): PyQt4-webkit-4.6.2-8.el6.x86_64.rpm | 85 kB 00:01
(3/4): PyQt4-webkit-devel-4.6.2-8.el6.x86_64.rpm | 11 kB 00:00
(4/4): sip-devel-4.9.3-1.el6.x86_64.rpm | 128 kB 00:04
——————————————————————————–
Total 124 kB/s | 6.9 MB 00:56
Running rpm_check_debug
Running Transaction Test
Transaction Test Succeeded
Running Transaction
Installing : sip-devel-4.9.3-1.el6.x86_64 1/4
Installing : PyQt4-devel-4.6.2-9.el6.x86_64 2/4
Installing : PyQt4-webkit-4.6.2-8.el6.x86_64 3/4
Installing : PyQt4-webkit-devel-4.6.2-8.el6.x86_64 4/4
Verifying : PyQt4-webkit-4.6.2-8.el6.x86_64 1/4
Verifying : PyQt4-webkit-devel-4.6.2-8.el6.x86_64 2/4
Verifying : sip-devel-4.9.3-1.el6.x86_64 3/4
Verifying : PyQt4-devel-4.6.2-9.el6.x86_64 4/4

Installed:
PyQt4-webkit.x86_64 0:4.6.2-8.el6 PyQt4-webkit-devel.x86_64 0:4.6.2-8.el6

Dependency Installed:
PyQt4-devel.x86_64 0:4.6.2-9.el6 sip-devel.x86_64 0:4.9.3-1.el6

Complete!
[root@elitebook rajiv]#


After that you can see QtWebKit.so exists in your  /usr/lib64/python2.6/site-packages/PyQt4 directory

qtwebkit


Cheers

-Rajiv Sharma


dt

http://www.digitaltutors.com/tutorial/1158-Integrating-a-3D-Vehicle-into-Video-in-Maya-and-NUKE

http://www.digitaltutors.com/11/tutor.php?id=259562

http://vimeo.com/68259025

http://www.youtube.com/watch?v=5Cw1_Gh5KiU

What you will learn In this tutorial we will cover how to create a live action shot with 3D elements. We will learn video shooting techniques, how to add 3D objects into live footage and then animation, lighting and rendering for the project in Maya and compositing in NUKE.

First, we will start with important settings of the DSLR Camera, then we will take our footage to Maya, where we will add 3D elements on our footage. After that we’ll animate lighting and rendering in passes. We will then take these 3D passes in NUKE and start compositing.In compositing we will learn how to use 3D passes to get realistic effects. Finally, we’ll cover rotoscoping, masking, and color correction in NUKE.

Sign In or Signup to Digital Tutors to watch this Course.
Thanks and Regards
Rajiv Sharma

teamviewer8

Download TeamViewer Full Version from :-

http://www.teamviewer.com/hi/download/linux.aspx

(Download TeamViewer for RedHat, CentOS, Fedora, SUSE)

teamviewer_linux.rpm will be download

Go to terminal and Enter Root:-

[rajiv@elitebook ~]$ su
[root@elitebook rajiv]# cd /home/rajiv/Downloads
[root@elitebook Downloads]# rpm -ivh  teamviewer_linux.rpm

warning: teamviewer_linux.rpm: Header V4 DSA/SHA1 Signature, key ID 72db573c: NOKEY
Preparing… ########################################### [100%]
1:teamviewer ########################################### [100%]

Go to Applications – Internet – TeamViewer8

teamview_screen

Cmake 2.8 for CentOS 6.4

Posted: June 8, 2013 in FX Pipeline, Linux

cmake_release

http://www.cmake.org/

Welcome to CMake, the cross-platform, open-source build system. CMake is a family of tools designed to build, test and package software.

CMake is used to control the software compilation process using simple platform and compiler independent configuration files.

CMake generates native makefiles and workspaces that can be used in the compiler environment of your choice.


Type as root in terminal :-

yum install cmake28 cmake28-gui


seafile seafile-logo-en

Seafile – File synchronization and collaboration for teams
If you are in a small team with a few people, you can create a group in Seafile and invite other team members. Team members can then maintain file libraries together. You may collaborate around the files online. With file synchronization, it’s also easy to work on a set of files together.

  • Private

    Deploy on your own servers, under your control. It’s open source. You can add features as you wish.

  • Convenient

    You can download and upload files on the website. You can also sync files to your computers with Seafile client program.

  • Reliable

    Seafile keeps every version of your files. You may restore a file to an older version, or restore a mistakenly deleted file.

  • Secure

    You may encrypt a file library with a password. The password won’t be stored by the server. So even the server administrator cannot view your private data.

Seafile Professional Edition — A Comprehensive Collaboraton Platform

windows

File Syncing and Sharing

Organize files into libraries. Each library can be shared between users and into groups. A library can also be selectively synced into any device.

windows

Collaboration and Discussion

Edit and comment files online. Messaging, group discussion, activity notification and file versions make collaboration easy and reliable.

windows

Tasks

It’s simple and efficient to maintain a to-do list and assign tasks online, with a plain text file or with the tasks module.

windows

Tags and Searching

Tag files, tasks and messages, organizing items in your way. Searching makes it even easier to find items.

Seafile Server Setup in CentOS 6.4

#Install Seafile in CentOS 6.4

yum install -y sqlite python-simplejson python-setuptools python-imaging python-argparse

#Download and install the latest version of Seafile
mkdir /opt/seafile
mkdir /opt/seafile/install
cd /opt/seafile/

wget http://seafile.googlecode.com/files/seafile-server_1.6.1_x86-64.tar.gz
tar -xzf seafile-server_1.6.1_x86-64.tar.gz

mv seafile-server* install/
cd install/seafile-server-1.6.1/
./setup-seafile.sh

./seafile.sh start

./seahub.sh

#you can enable debug on Seahub to see what is wrong.

Add “DEBUG = True” in seahub_settings.py, and restart your Seahub by :-
./seahub.sh restart

[root@elitebook seafile-server-1.6.1]# ./setup-seafile.sh

You are running this script as ROOT. Are you sure to continue?
[yes|no] yes

—————————————————————–
This script will guide you to config and setup your seafile server.

Make sure you have read seafile server manual at

https://github.com/haiwen/seafile/wiki

Press [ENTER] to continue
—————————————————————–
Checking packages needed by seafile …

Checking python on this machine …
Find python: python2.6

Checking python module: setuptools … Done.
Checking python module: python-simplejson … Done.
Checking python module: python-imaging … Done.
Checking python module: python-sqlite3 … Done.

Checking for sqlite3 …Done.

Checking Done.

It seems you have created a ccnet configuration before.
Do you want to use the existing configuration?
[yes|no] yes

Existing ccnet configuration would be used.

Where do you want to put your seafile data?
Note: Please use a volume with enough free space.
[default: /opt/seafile/install/seafile-data ]

It seems you have existing seafile data in /opt/seafile/install/seafile-data.
Do you want to use the existing seafile data?
[yes|no] yes
This is your config information:

ccnet config: use existing config in /opt/seafile/install/ccnet
seafile data dir: use existing data in /opt/seafile/install/seafile-data

If you are OK with these configuration, press [ENTER] to continue.

—————————————————————–
Seahub is the web interface for seafile server.
Now let’s setup seahub configuration. Press [ENTER] to continue
—————————————————————–
Please specify the email address and password for seahub admininstrator.
You would use them to login as admin on your seahub website.

Please specify the email address for seahub admininstrator:
[seahub admin email]: rajiv.vfx@gmail.com

Please specify the passwd you want to use for seahub admininstrator:
[seahub admin password]:
Please ensure the passwd again:
[seahub admin password again]:
This is your seahub admin username/password

admin user name: rajiv.vfx@gmail.com
admin password: **************
If you are OK with these configuration, press [ENTER] to continue.

Now sync seahub database …

Loading ccnet config from /opt/seafile/install/ccnet
Loading seafile config from /opt/seafile/install/seafile-data
Creating tables …
Installing custom SQL …
Installing indexes …
No fixtures found.

Done.

—————————————————————–
Your seafile server configuration has been finished successfully.
—————————————————————–

run seafile server: ./seafile.sh { start | stop | restart }
run seahub server: ./seahub.sh { start <port> | stop | restart <port> }

—————————————————————–
If you are behind a firewall, remember to allow input/output of these tcp ports:
—————————————————————–

port of ccnet server:
port of seafile server:
port of seafile httpserver:
port of seahub: 8000

When problems occur, Refer to

https://github.com/haiwen/seafile/wiki

for information.

[root@elitebook seafile-server-1.6.1]#

You can Login to Seafile Server by :-

http://192.168.0.103:8000   (http://ip-address:8000)

http://elitebook:8000   (http://your-domain-name:8000)

Allow the Seafile admin port 8000 through iptables if you have any trouble to access admin console in remote systems

gedit /etc/sysconfig/iptables
# add these in that file
-A INPUT -p udp -m state –state NEW –dport 8000 -j ACCEPT
-A INPUT -p tcp -m state –state NEW –dport 8000 -j ACCEPT

# restart iptables and firewall rules
/etc/init.d/iptables restart

seafile_screen

Seafile CLI client

Installation

  1. Download the client
    wget http://seafile.googlecode.com/files/seafile-cli_1.6.1_x86-64.tar.gz
    tar -xzf seafile-cli_1.6.1_x86-64.tar.gz
  2. Initialise & daemonize the client
    cd seafile-cli_1.6.1
    # choose a folder where to store the seafile client settings e.g ~/.seafile-client
    mkdir ~/.seafile-client            # create the settings folder
    ./seaf-cli init -d ~/.seafile-client  # initialise seafile client with this folder
    ./seaf-cli start
  3. Install seafile in your environment
    #link the full path of the exectuable
    ln -s `readlink -f seaf-cli` /usr/bin/
  4. Download a library from a server
    1. retrieve the library id by browsing on the server -> it’s in the url after /repo/
    2. then
      seaf-cli download -l "the id of the library" -s  "the url + port of server" -d "the folder where the library folder will be downloaded" -u "username on server" [-p "password"]
      seaf-cli status  # check status of ongoing downloads
      # Name  Status  Progress
      # Apps    downloading     9984/10367, 9216.1KB/s

    Note: if you not supply the password parameter in the command, it will be asked later, which is more safe.

    Example:seaf-cli download -l 0536c006-8a43-449e-8718-39f12111620d -s http://cloud.seafile.com -d /tmp -u freeplant@test.com

  5. Download a library from a server and sync with an existing folder.
    # This is the same as download : replace download by sync 
    seaf-cli sync -l "the id of the library" -s  "the url + port of server" -d "the folder where the library folder will be downloaded" -u "username on server" -p "password"
  6. rejoice

Man documentation

seaf-cli is command line interface for seafile client.

Subcommands:

init:           create config files for seafile client
start:          start and run seafile client as daemon
stop:           stop seafile client
list:           list local liraries
status:         show syncing status
download:       download a library from seafile server
sync:           synchronize an existing folder with a library in
                    seafile server
desync:         desynchronize a library with seafile server

Detail

Seafile client stores all its configure information in a config dir. The default location is ~/.ccnet. All the commands below accept an option -c <config-dir>.

init

Initialize seafile client. This command initializes the config dir. It also creates sub-directories seafile-data and seafile underparent-dirseafile-data is used to store internal data, while seafile is used as the default location put downloaded libraries.

seaf-cli init [-c <config-dir>] -d <parent-dir>

start

Start seafile client. This command start ccnet and seaf-daemonccnet is the network part of seafile client, seaf-daemon manages the files.

seaf-cli start [-c <config-dir>]

stop

Stop seafile client.

seaf-cli stop [-c <config-dir>]

Download

Download a library from seafile server

seaf-cli download -l <library-id> -s <seahub-server-url> -d <parent-directory> -u <username> [-p <password>]

sync

Synchronize a library with an existing folder.

seaf-cli sync -l <library-id> -s <seahub-server-url> -d <existing-folder> -u <username> [-p <password>]

desync

Desynchronize a library from seafile server

seaf-cli desync -d <existing-folder>

subversion

http://subversion.apache.org/

Subversion is an open source version control system.

Subversion exists to be universally recognized and adopted as an open-source, centralized version control system characterized by its reliability as a safe haven for valuable data; the simplicity of its model and usage; and its ability to support the needs of a wide variety of users and projects, from individuals to large-scale enterprise operations.

SVM version

Download the Source Code

http://www.gtlib.gatech.edu/pub/apache/subversion/subversion-1.7.9.tar.bz2

lrg

Download The Free Book :- http://svnbook.red-bean.com/en/1.7/svn-book.pdf

Installation and Configuration Process on Centos 6.4

yum install -y subversion mod_dav_svn

Configure Subversion
gedit /etc/httpd/conf.d/subversion.conf

LoadModule dav_svn_module modules/mod_dav_svn.so
LoadModule authz_svn_module modules/mod_authz_svn.so
<Location /svn>
DAV svn
SVNParentPath /var/www/svn
AuthType Basic
AuthName “Subversion repositories”
AuthUserFile /etc/svn-auth-users
Require valid-user
</Location>
#
# Example configuration to enable HTTP access for a directory
# containing Subversion repositories, “/var/www/svn”. Each repository
# must be both:
create New User for Subversion

htpasswd -cm /etc/svn-auth-users rajiv
New password:
Re-type new password:
Adding password for user rajiv

Create and configure Subversion Repository (MX Studio application)
mkdir /var/www/svn
cd /var/www/svn/
svnadmin create mxstudio_repo
chown -R apache.apache mxstudio_repo/

chcon -R -t httpd_sys_content_t /var/www/svn/mxstudio_repo/
chcon -R -t httpd_sys_rw_content_t /var/www/svn/mxstudio_repo/
gedit /etc/sysconfig/iptables

-A INPUT -p udp -m state –state NEW –dport 80 -j ACCEPT
-A INPUT -p tcp -m state –state NEW –dport 80 -j ACCEPT

/etc/init.d/iptables restart

/etc/init.d/httpd restart

Test Subversion
enter the following URL http://ip-address/svn/mxstudio_repo

In My Case its : http://192.168.0.103/svn/mxstudio_repo/

Create additional links(directories) under Subversion Repository

[root@mx rajiv]# mkdir mx-studio
[root@mx rajiv]# cd mx-studio
[root@mx mx-studio]# mkdir python
[root@mx mx-studio]# mkdir bin
[root@mx mx-studio]# mkdir updates
[root@mx mx-studio]# mkdir doc
[root@mx mx-studio]# mkdir json
[root@mx mx-studio]# svn import -m ‘Initial import’ mx-studio/ http://192.168.0.103/svn/mxstudio_repo/
Authentication realm: <http://192.168.0.103:80&gt; Subversion repositories
Password for ‘root’:
Authentication realm: <http://192.168.0.103:80&gt; Subversion repositories
Username: rajiv
Password for ‘rajiv’:
Adding mx-studio/python
Adding mx-studio/updates
Adding mx-studio/doc
Adding mx-studio/bin
Adding mx-studio/json

———————————————————————–
ATTENTION! Your password for authentication realm:

<http://192.168.0.103:80&gt; Subversion repositories

can only be stored to disk unencrypted! You are advised to configure
your system so that Subversion can store passwords encrypted, if
possible. See the documentation for details.

You can avoid future appearances of this warning by setting the value
of the ‘store-plaintext-passwords’ option to either ‘yes’ or ‘no’ in
‘/root/.subversion/servers’.
———————————————————————–
Store password unencrypted (yes/no)? yes

Committed revision 1.
[root@mx rajiv]#

svn_screen


Cacti_3 cacti_3_lg Cacti Screenshot 38 Cacti_(software)_screenshot

What is Cacti?

Cacti is a complete frontend to RRDTool, it stores all of the necessary information to create graphs and populate them with data in a MySQL database. The frontend is completely PHP driven. Along with being able to maintain Graphs, Data Sources, and Round Robin Archives in a database, cacti handles the data gathering. There is also SNMP support for those used to creating traffic graphs with MRTG.

Data Sources
To handle data gathering, you can feed cacti the paths to any external script/command along with any data that the user will need to “fill in”, cacti will then gather this data in a cron-job and populate a MySQL database/the round robin archives.

Data Sources can also be created, which correspond to actual data on the graph. For instance, if a user would want to graph the ping times to a host, you could create a data source utilizing a script that pings a host and returns it’s value in milliseconds. After defining options for RRDTool such as how to store the data you will be able to define any additional information that the data input source requires, such as a host to ping in this case. Once a data source is created, it is automatically maintained at 5 minute intervals.

Graphs
Once one or more data sources are defined, an RRDTool graph can be created using the data. Cacti allows you to create almost any imaginable RRDTool graph using all of the standard RRDTool graph types and consolidation functions. A color selection area and automatic text padding function also aid in the creation of graphs to make the process easier.

Not only can you create RRDTool based graphs in cacti, but there are many ways to display them. Along with a standard “list view” and a “preview mode”, which resembles the RRDTool frontend 14all, there is a “tree view”, which allows you to put graphs onto a hierarchical tree for organizational purposes.

User Management
Due to the many functions of cacti, a user based management tool is built in so you can add users and give them rights to certain areas of cacti. This would allow someone to create some users that can change graph parameters, while others can only view graphs. Each user also maintains their own settings when it comes to viewing graphs.

Templating
Lastly, cacti is able to scale to a large number of data sources and graphs through the use of templates. This allows the creation of a single graph or data source template which defines any graph or data source associated with it. Host templates enable you to define the capabilities of a host so cacti can poll it for information upon the addition of a new host.

to find out more :-  http://www.cacti.net/what_is_cacti.php


Installation process of CACTI
yum install httpd httpd-devel -y
yum install mysql mysql-server -y
yum install php-mysql php-pear php-common php-gd php-devel php php-mbstring php-cli php-mysql -y
yum install php-snmp -y
yum install net-snmp-utils net-snmp-libs php-pear-Net-SMTP -y
yum install rrdtool -y
/etc/init.d/httpd start
/etc/init.d/mysqld start
/etc/init.d/snmpd start

chkconfig httpd on
chkconfig mysqld on
chkconfig snmpd on
yum install cacti -y

Configure MySQL
Login to MySQL server as root user and create a database for Cacti. Here i use Cacti database name as cacti, username as cacti and password as centos respectively.

mysql -u root -p
Enter password:
mysql> create database cacti;
Query OK, 1 row affected (0.01 sec)

mysql> GRANT ALL ON cacti.* TO cacti@localhost IDENTIFIED BY ‘centos’;
Query OK, 0 rows affected (0.00 sec)

mysql> flush privileges;
Query OK, 0 rows affected (0.01 sec)

mysql> exit
mysql -u cacti -p cacti < /usr/share/doc/cacti-0.8.8a/cacti.sql
Enter password: (centos)

gedit /etc/cacti/db.php
/* make sure these values refect your actual database/host/user/password */
$database_type = “mysql”;
$database_default = “cacti”; ## Name of the Cacti Database ##
$database_hostname = “localhost”;
$database_username = “cacti”; ## Username for Cacti database ##
$database_password = “centos”; ## Database password ##
$database_port = “3306”;
$database_ssl = false;

/*

gedit /etc/httpd/conf.d/cacti.conf

Alias /cacti /usr/share/cacti

<Directory /usr/share/cacti/>
<IfModule mod_authz_core.c>
# httpd 2.4
Require host localhost
</IfModule>
<IfModule !mod_authz_core.c>
# httpd 2.2
Order deny,allow
Deny from all
Allow from 192.168.0.103 (this is Local IP Address)
</IfModule>
</Directory>
/etc/init.d/httpd restart
to run CACTI Installer :-
http://ip-address/cacti
In my Case – http://192.168.0.103/cacti

Screenshot


error


when i am trying to open gedit from terminal i got Gtk-WARNING

similar to that :-
gedit /etc/httpd/conf.d/subversion.conf
No protocol specified

(gedit:13752): Gtk-WARNING **: cannot open display: :0.0


to fix this issue :-
(Non Root)
[rajiv@mx ~]$ xhost +local:root
non-network local connections being added to access control list

With ROOT

[root@mx rajiv]# export DISPLAY=:0.0

Now everything is working fine 🙂


cpu04 cpu03 cpu02 cpu_01

How to Get CPU Temperature Information on Linux (CentOS 6.4 /RHEL)

lm_sensor is a tool that can monitor linux hardware

for installation :-
yum install lm_sensors

for Configuration :-
sensors-detect
(YES to all prompt)

to get the temperature information:-
sensors
and the output will be :-
[rajiv@elitebook ~]$ sensors
acpitz-virtual-0
Adapter: Virtual device
temp1: +34.0°C (crit = +128.0°C)
temp2: +45.0°C (crit = +128.0°C)
temp3: +34.0°C (crit = +128.0°C)
temp4: +34.0°C (crit = +128.0°C)
temp5: +34.0°C (crit = +128.0°C)
temp6: +0.0°C (crit = +128.0°C)
temp7: +0.0°C (crit = +128.0°C)
temp8: +0.0°C (crit = +128.0°C)
temp9: +0.0°C (crit = +128.0°C)
temp10: +0.0°C (crit = +128.0°C)

coretemp-isa-0000
Adapter: ISA adapter
Physical id 0: +40.0°C (high = +86.0°C, crit = +100.0°C)
Core 0: +40.0°C (high = +86.0°C, crit = +100.0°C)
Core 1: +35.0°C (high = +86.0°C, crit = +100.


This is the same procedure:-

[rajiv@elitebook ~]$ su
Password:
[root@elitebook rajiv]# yum install lm_sensors
Loaded plugins: fastestmirror, refresh-packagekit, security
Loading mirror speeds from cached hostfile
epel/metalink | 3.8 kB 00:00
* base: centos.aol.in
* elrepo: ftp.osuosl.org
* epel: ftp.jaist.ac.jp
* extras: centos.aol.in
* remi: rpms.famillecollet.com
* rpmforge: http://www.mirrorservice.org
* updates: centos.aol.in
base | 3.7 kB 00:00
elrepo | 2.9 kB 00:00
extras | 3.5 kB 00:00
google-chrome | 951 B 00:00
linuxtech-release | 2.6 kB 00:00
remi | 2.9 kB 00:00
rpmforge | 1.9 kB 00:00
updates | 3.4 kB 00:00
Setting up Install Process
Resolving Dependencies
–> Running transaction check
—> Package lm_sensors.x86_64 0:3.1.1-17.el6 will be installed
–> Finished Dependency Resolution

Dependencies Resolved

================================================================
Package Arch Version Repository
Size
================================================================
Installing:
lm_sensors x86_64 3.1.1-17.el6 base 123 k

Transaction Summary
================================================================
Install 1 Package(s)

Total download size: 123 k
Installed size: 350 k
Is this ok [y/N]: y
Downloading Packages:
lm_sensors-3.1.1-17.el6.x86_64.rpm | 123 kB 00:00
Running rpm_check_debug
Running Transaction Test
Transaction Test Succeeded
Running Transaction
Installing : lm_sensors-3.1.1-17.el6.x86_64 1/1
Verifying : lm_sensors-3.1.1-17.el6.x86_64 1/1

Installed:
lm_sensors.x86_64 0:3.1.1-17.el6

Complete!
[root@elitebook rajiv]# sensors-detect
# sensors-detect revision 1.1
# System: Hewlett-Packard HP EliteBook 8760w (laptop)
# Board: Hewlett-Packard 1630

This program will help you determine which kernel modules you need
to load to use lm_sensors most effectively. It is generally safe
and recommended to accept the default answers to all questions,
unless you know what you’re doing.

Some south bridges, CPUs or memory controllers contain embedded sensors.

Silicon Integrated Systems SIS5595… No
VIA VT82C686 Integrated Sensors… No
VIA VT8231 Integrated Sensors… No
AMD K8 thermal sensors… No
AMD Family 11h thermal sensors… No
Intel digital thermal sensor… Success!
(driver `coretemp’)
Intel AMB FB-DIMM thermal sensor… No
VIA C7 thermal and voltage sensors… No

Some Super I/O chips contain embedded sensors. We have to write to
standard I/O ports to probe them. This is usually safe.
Do you want to scan for Super I/O sensors? (YES/no): YES
Probing for Super-I/O at 0x2e/0x2f
Trying family `National Semiconductor’… No
Trying family `SMSC’… Yes
Found unknown chip with ID 0x0701
Probing for Super-I/O at 0x4e/0x4f
Trying family `National Semiconductor’… No
Trying family `SMSC’… Yes
Found unknown non-standard chip with ID 0x7a

Some hardware monitoring chips are accessible through the ISA I/O ports.
We have to write to arbitrary I/O ports to probe them. This is usually
safe though. Yes, you do have ISA I/O ports even if you do not have any
ISA slots! Do you want to scan the ISA I/O ports? (YES/no): YES
Probing for `National Semiconductor LM78′ at 0x290… No
Probing for `National Semiconductor LM79′ at 0x290… No
Probing for `Winbond W83781D’ at 0x290… No
Probing for `Winbond W83782D’ at 0x290… No

Lastly, we can probe the I2C/SMBus adapters for connected hardware
monitoring devices. This is the most risky part, and while it works
reasonably well on most systems, it has been reported to cause trouble
on some systems.
Do you want to probe the I2C/SMBus adapters now? (YES/no): YES
Sorry, no supported PCI bus adapters found.
Module i2c-dev loaded successfully.

Next adapter: NVIDIA i2c adapter 0 at 1:00.0 (i2c-0)
Do you want to scan it? (YES/no/selectively): YES

Next adapter: NVIDIA i2c adapter 1 at 1:00.0 (i2c-1)
Do you want to scan it? (YES/no/selectively): YES
Client found at address 0x28
Probing for `National Semiconductor LM78’… No
Probing for `National Semiconductor LM79’… No
Probing for `National Semiconductor LM80’… No
Probing for `Winbond W83781D’… No
Probing for `Winbond W83782D’… No
Probing for `Winbond W83627HF’… No
Probing for `Winbond W83627EHF’… No
Probing for `Winbond W83627DHG/W83667HG/W83677HG’… No
Probing for `Asus AS99127F (rev.1)’… No
Probing for `Asus AS99127F (rev.2)’… No
Probing for `Asus ASB100 Bach’… No
Probing for `Analog Devices ADM1029’… No
Probing for `ITE IT8712F’… No
Client found at address 0x50
Probing for `Analog Devices ADM1033’… No
Probing for `Analog Devices ADM1034’… No
Probing for `SPD EEPROM’… No
Probing for `EDID EEPROM’… Yes
(confidence 8, not a hardware monitoring chip)

Next adapter: NVIDIA i2c adapter 2 at 1:00.0 (i2c-2)
Do you want to scan it? (YES/no/selectively): YES

Next adapter: NVIDIA i2c adapter 3 at 1:00.0 (i2c-3)
Do you want to scan it? (YES/no/selectively): YES

Next adapter: NVIDIA i2c adapter 5 at 1:00.0 (i2c-4)
Do you want to scan it? (YES/no/selectively): YES

Next adapter: NVIDIA i2c adapter 6 at 1:00.0 (i2c-5)
Do you want to scan it? (YES/no/selectively): YES

Next adapter: NVIDIA i2c adapter 7 at 1:00.0 (i2c-6)
Do you want to scan it? (YES/no/selectively): YES

Next adapter: NVIDIA i2c adapter 8 at 1:00.0 (i2c-7)
Do you want to scan it? (YES/no/selectively): YES

Next adapter: NVIDIA i2c adapter 9 at 1:00.0 (i2c-8)
Do you want to scan it? (YES/no/selectively): YES

Next adapter: NVIDIA i2c adapter 13 at 1:00.0 (i2c-9)
Do you want to scan it? (YES/no/selectively): YES
Adapter cannot be probed, skipping.
Next adapter: NVIDIA i2c adapter 12 at 1:00.0 (i2c-10)
Do you want to scan it? (YES/no/selectively): YES
Adapter cannot be probed, skipping.
Next adapter: NVIDIA i2c adapter 11 at 1:00.0 (i2c-11)
Do you want to scan it? (YES/no/selectively): YES
Adapter cannot be probed, skipping.
Next adapter: NVIDIA i2c adapter 10 at 1:00.0 (i2c-12)
Do you want to scan it? (YES/no/selectively): YES
Adapter cannot be probed, skipping.
Now follows a summary of the probes I have just done.
Just press ENTER to continue:

Driver `coretemp’:
* Chip `Intel digital thermal sensor’ (confidence: 9)

Do you want to overwrite /etc/sysconfig/lm_sensors? (YES/no): YES
Starting lm_sensors: loading module coretemp [ OK ]
Unloading i2c-dev… OK


xampp


XAMPP Installation in CentOS 6.4 64bit
Many people know from their own experience that it’s not easy to install an Apache web server and it gets harder if you want to add MySQL, PHP and Perl.
XAMPP is an easy to install Apache distribution containing MySQL, PHP and Perl. XAMPP is really very easy to install and to use – just download, extract and start.

http://www.apachefriends.org/en/xampp-linux.html
tar xvfz xampp-linux-1.8.1.tar.gz -C /opt

/opt/lampp/lampp start

http://localhost/

make sure Apache httpd service is off (otherwide xampp will not start)
service httpd stop

if phpmyadmin is not open

Edit /opt/lampp/etc/extra/httpd-xampp.conf
and adding Require all granted line at bottom of block <Directory “/opt/lampp/phpmyadmin”> to have the following code:
<Directory “/opt/lampp/phpmyadmin”>
AllowOverride AuthConfig Limit
Order allow,deny
Allow from all
Require all granted
</Directory>


youtube

how to download youtube videos on Linux centOS 6.4
####install youtube-dl

yum install youtube-dl

for download any video you should type following command with youtube URL

youtube-dl <video URL>


for example:-

youtube-dl http://www.youtube.com/watch?v=jYTNHLfpQTI

common error:-

[root@elitebook rajiv]# youtube-dl http://www.youtube.com/watch?v=jYTNHLfpQTI Setting language

U2vvLAPmpeA: Downloading video webpage

U2vvLAPmpeA: Downloading video info webpage

U2vvLAPmpeA: Extracting video information

ERROR: unable to download video

to fix this error you need to update the youtube downloader by following command:-
youtube-dl -U
now you can see the progress:-

[rajiv@elitebook ~]$ youtube-dl http://www.youtube.com/watch?v=jYTNHLfpQTI

Setting language jYTNHLfpQTI: Downloading video webpage

jYTNHLfpQTI: Downloading video info webpage

jYTNHLfpQTI: Extracting video information[download] Destination: introduction of Centos 6.4-jYTNHLfpQTI.webm

[download] 100.0% of 13.41MiB at 2409.86KiB/s ETA 00:00

[rajiv@elitebook ~]$

you can download a list of youtube video links by this command
youtube-dl -a youtube_list.txt

you can download in other available formats of video
youtube-dl -F http://www.youtube.com/watch?v=jYTNHLfpQTI

for example:-

[rajiv@elitebook ~]$ youtube-dl -F http://www.youtube.com/watch?v=jYTNHLfpQTI

Setting language

jYTNHLfpQTI: Downloading video webpage

jYTNHLfpQTI: Downloading video info webpage

jYTNHLfpQTI: Extracting video information

Available formats

:45      :      webm    [720×1280]

22      :       mp4     [720×1280]

44      :       webm    [480×854]

35      :       flv     [480×854]

43      :       webm    [360×640]

34      :       flv     [360×640]

18      :       mp4     [360×640]

5       :       flv     [240×400]

17      :       mp4     [144×176]

[rajiv@elitebook ~]$
To download the file in your preferred format, type
youtube-dl -f <format code> <video url>
for example lets download mp4 format:-

youtube-dl -f 22 http://www.youtube.com/watch?v=jYTNHLfpQTI

To Download the audio for youtube video
youtube-dl http://www.youtube.com/watch?v=jYTNHLfpQTI –extract-audio
to extract audio as a mp3

youtube-dl http://www.youtube.com/watch?v=jYTNHLfpQTI –audio-format mp3

Enjoy Youtube 🙂

introduction of Centos 6.4

Posted: April 21, 2013 in FX Pipeline, Linux

how to install centos 6.4

Posted: April 20, 2013 in FX Pipeline, Linux


eclipse for maya

Install and configure Eclipse as a Maya IDE on linux

Operating system : CentOS 6.4 64bit
Software: Maya 2012 64bit
Eclipse : eclipse-SDK-4.2.2-linux-gtk-x86_64.tar.gz
Python : 2.6

download and extract Eclipse Classic 4.2.2 from http://www.eclipse.org/downloads/

Relocate Eclipse

mv /tpm/eclipse /opt

Create a Symlink
ln -s /opt/eclipse/eclipse /usr/bin/eclipse

After you can Start Eclipse from Terminal simply with:

eclipse


click on eclipse executable file and application will run.

(make sure in the permissions tab of eclipse Execute cliked to allow execute file as program)


Install pydev

In Eclipse, go to the Help – Install New Software – click on Add

eclipse_for_maya_2

in add repository window copy following
Name : pydev
Location: http://pydev.org/updates

Hit OK.

In next window just select pydev.

eclipse_for_maya_3

after installation restart the application

Install maya editor for eclipse

Download from :- http://www.creativecrash.com/maya/downloads/applications/syntax-scripting/c/eclipse-maya-editor

Setup:

1. Unzip the dowloaded file in a temp directory

2. In Eclipse, go to the Help/Install New Software page. Click on “Add” and then “Local” and navigate to the temp directory where the org.eclipse.eclipseMayaEditorProject is

3. In the “Name” section, make sure “Uncategorized” is selected and then click “Next”

4. Allow Eclipse to relaunch and once it’s back, the EclipseMaya toolbar should be visible

5. In Maya, create a new shelf button with the following code or put it in the Startup script
import maya.cmds as cmds

if cmds.commandPort(‘:7720′, q=True) !=1:

cmds.commandPort(n=’:7720′, eo = False, nr = True)
Port Number – By default, the port number has been set to 7720. It can be changed at any time. Remember to press the “Reconnect Eclipse to Maya” button. This is handy if you have more than one instance of Maya open at once.

eclipse_for_maya_4
Configure Python in Eclipse
In Eclipse, go to Windows – Preferences – Pydev – Interpreter-Python

click on New

Interpreter Name : python2.6
Interpreter Executable : /usr/bin/python2.6

eclipse_for_maya_5
Restart application.


How to check bandwidth usage on Centos 6.4  (iftop)


install iftop

open terminal :-

[root@elitebook bin]# yum install iftop

iftop_install


[root@elitebook bin]# iftop


iftop_output


xvidcap is a screencast – Screen recording application for Linux.

It allows you to capture either parts of the full screen of your Linux desktop.

This makes it an ideal tool for making either demonstrations of software – such as tutorials or for documenting installation of different software packages.

The screen capture is actually done by saving each frame as an individual image – this is then sent through a transcoder which produces a complete MPEG video file.

A small tool to capture things going on on an X-Windows display to either individual frames or an MPEG video similar to tools such as Lotus ScreenCam orXVIDCap.


download link http://sourceforge.net/projects/xvidcap/files/

extract xvidcap-1.1.7.tar.gz

Open terminal:-

[rajiv@elitebook ~]$ su

[root@elitebook rajiv]# cd /home/rajiv/xvidcap-1.1.7


[root@elitebook rajiv]# yum install gtk*

[root@elitebook rajiv]# yum install libglade*


[root@elitebook rajiv]# ./configure

[root@elitebook rajiv]# make

[root@elitebook rajiv]# make install


bamboo-fun-2011


wacom bamboo fun pen and touch Tablet Drivers Set Up on Linux CentOS 6.4 64bit

wacom bamboo Drivers On Centos 6

I am Using : BAMBOO CTH-670

Linux OS – CentOS 6.4 64bit

Kernel – 2.6.32-358.2.1.el6.x86_64


Download Latest Wacom Linux Drivers from this Link :-

http://sourceforge.net/projects/linuxwacom/files/xf86-input-wacom/input-wacom/

I am Using  input-wacom-0.16.0.tar.bz2

Extract this after Download.


[Rajiv@xw8600 ~]$ su

[root@xw8600 Rajiv]# cd /home/Rajiv/Downloads/input-wacom-0.16.0

[root@xw8600 Rajiv]# ./configure


##### Follow the instructions provided at the end of the build to copy the kernel modules to your system’s module directory. USB tablets rely on the wacom.ko kernel module.


[root@xw8600 Rajiv]# cp 2.6.30/wacom.ko /lib/modules/2.6.32-358.2.1.el6.x86_64/kernel/drivers/input/tablet

[root@xw8600 Rajiv]# cp 2.6.30/wacom_w8001.ko /lib/modules/2.6.32-358.2.1.el6.x86_64/kernel/drivers/input/touchscreen


[root@xw8600 Rajiv]# depmod -a

[root@xw8600 Rajiv]# yum update

[root@xw8600 Rajiv]# /sbin/depmod -e


[root@xw8600 Rajiv]# reboot


Enjoy your Wacom In Linux 🙂

header_bamboo


qt-main


How to install QT and PyQt4 in centOS 6.4


[Rajiv@xw8600 ~]$ su

[root@xw8600 Rajiv]# yum install PyQt4

[root@xw8600 Rajiv]# yum install qt qt-demos qt-designer qt4 qt4-designer

[root@xw8600 Rajiv]# yum update


Centos 6 Yum Update Error:-  Requires: python(abi) = 2

[root@gts250 rajiv]# yum update
Loaded plugins: fastestmirror, refresh-packagekit, security
Loading mirror speeds from cached hostfile
* base: mirror.nbrc.ac.in
* elrepo: jur-linux.org
* extras: mirror.nbrc.ac.in
* rpmforge: mirror.nl.leaseweb.net
* updates: mirror.nbrc.ac.in
Setting up Update Process
Resolving Dependencies
–> Running transaction check
—> Package libsmbclient.x86_64 0:3.6.9-151.el6 will be obsoleted
—> Package libsmbclient0.x86_64 0:3.5.21-44.el5 will be obsoleting
–> Processing Dependency: libwbclient.so.0()(64bit) for package: libsmbclient0-3.5.21-44.el5.x86_64
–> Processing Dependency: libldap-2.3.so.0()(64bit) for package: libsmbclient0-3.5.21-44.el5.x86_64
–> Processing Dependency: liblber-2.3.so.0()(64bit) for package: libsmbclient0-3.5.21-44.el5.x86_64
—> Package python-beaker.noarch 0:1.3.1-6.el6 will be updated
—> Package python-beaker.noarch 0:1.5.3-1.el5.rf will be an update
–> Processing Dependency: python(abi) = 2.4 for package: python-beaker-1.5.3-1.el5.rf.noarch
—> Package python-mako.noarch 0:0.3.4-1.el6 will be updated
—> Package python-mako.noarch 0:0.3.5-1.el5.rf will be an update
–> Processing Dependency: python(abi) = 2.4 for package: python-mako-0.3.5-1.el5.rf.noarch
—> Package python-markupsafe.x86_64 0:0.9.2-4.el6 will be updated
—> Package python-markupsafe.x86_64 0:0.11-1.el5.rf will be an update
–> Processing Dependency: python(abi) = 2.4 for package: python-markupsafe-0.11-1.el5.rf.x86_64
—> Package python-paramiko.noarch 0:1.7.5-2.1.el6 will be updated
—> Package python-paramiko.noarch 0:1.7.6-1.el5.rf will be an update
–> Processing Dependency: python(abi) = 2.4 for package: python-paramiko-1.7.6-1.el5.rf.noarch
—> Package samba.x86_64 0:3.6.9-151.el6 will be obsoleted
—> Package samba-client.x86_64 0:3.6.9-151.el6 will be obsoleted
—> Package samba-common.x86_64 0:3.6.9-151.el6 will be obsoleted
—> Package samba-winbind.x86_64 0:3.6.9-151.el6 will be obsoleted
—> Package samba-winbind-clients.x86_64 0:3.6.9-151.el6 will be obsoleted
—> Package samba3.x86_64 0:3.5.21-44.el5 will be obsoleting
—> Package samba3-client.x86_64 0:3.5.21-44.el5 will be obsoleting
–> Processing Dependency: libreadline.so.5()(64bit) for package: samba3-client-3.5.21-44.el5.x86_64
—> Package samba3-winbind.x86_64 0:3.5.21-44.el5 will be obsoleting
–> Running transaction check
—> Package compat-openldap.x86_64 1:2.3.43-2.el6 will be installed
—> Package compat-readline5.x86_64 0:5.2-17.1.el6 will be installed
—> Package libwbclient0.x86_64 0:3.5.21-44.el5 will be installed
—> Package python-beaker.noarch 0:1.5.3-1.el5.rf will be an update
–> Processing Dependency: python(abi) = 2.4 for package: python-beaker-1.5.3-1.el5.rf.noarch
—> Package python-mako.noarch 0:0.3.5-1.el5.rf will be an update
–> Processing Dependency: python(abi) = 2.4 for package: python-mako-0.3.5-1.el5.rf.noarch
—> Package python-markupsafe.x86_64 0:0.11-1.el5.rf will be an update
–> Processing Dependency: python(abi) = 2.4 for package: python-markupsafe-0.11-1.el5.rf.x86_64
—> Package python-paramiko.noarch 0:1.7.6-1.el5.rf will be an update
–> Processing Dependency: python(abi) = 2.4 for package: python-paramiko-1.7.6-1.el5.rf.noarch
–> Processing Conflict: krb5-libs-1.10.3-10.el6.i686 conflicts libsmbclient < 3.5.10-124
–> Processing Conflict: krb5-libs-1.10.3-10.el6.x86_64 conflicts libsmbclient < 3.5.10-124
–> Finished Dependency Resolution
Error: Package: python-markupsafe-0.11-1.el5.rf.x86_64 (rpmforge)
Requires: python(abi) = 2.4
Installed: python-2.6.6-36.el6.x86_64 (@base)
python(abi) = 2.6
Error: krb5-libs conflicts with libsmbclient0-3.5.21-44.el5.x86_64
Error: Package: python-beaker-1.5.3-1.el5.rf.noarch (rpmforge)
Requires: python(abi) = 2.4
Installed: python-2.6.6-36.el6.x86_64 (@base)
python(abi) = 2.6
Error: Package: python-mako-0.3.5-1.el5.rf.noarch (rpmforge)
Requires: python(abi) = 2.4
Installed: python-2.6.6-36.el6.x86_64 (@base)
python(abi) = 2.6
Error: Package: python-paramiko-1.7.6-1.el5.rf.noarch (rpmforge)
Requires: python(abi) = 2.4
Installed: python-2.6.6-36.el6.x86_64 (@base)
python(abi) = 2.6
You could try using –skip-broken to work around the problem
You could try running: rpm -Va –nofiles –nodigest
[root@gts250 rajiv]#

The error message indicates yum is trying to install from the repoforge el5 repository instead of el6. This needs to be corrected.

Here is the solution for this problem:-

solution :- reinstall rpmforge

go to terminal

01.

[root@gts250 rajiv]# su

02.

[root@gts250 rajiv]# wget http://packages.sw.be/rpmforge-release/rpmforge-release-0.5.2-2.el6.rf.x86_64.rpm

03.

[root@gts250 rajiv]# rpm -Uvh rpmforge-release-0.5.2-2.el6.rf.x86_64.rpm


04.

[root@gts250 rajiv]# yum clean all

05.

[root@gts250 rajiv]# yum update


centos.gif

Hi Friends,
build your Own Yum Repository
you can free download .Rpm package from:-
http://centosmirror.go4hosting.in/centos/6.4/isos/x86_64/CentOS-6.4-x86_64-bin-DVD2.iso

lets start the process

step 01:-

[root@xw8600 Rajiv]#  yum -y install createrepo

step 02:-
[root@xw8600 Rajiv]# gedit /etc/yum.repos.d/hqvfx.repo

and copy similar entry (just change names and path according to your server)
In my case i have already map server drive in media.

# this is a Yum Repository file
[HQVFX-PIPELINE]
name= HQVFX Computing Lab Pipeline CentOS 6.4 RPM Repository
baseurl=file:///media/pipeline/repo/Centos6.4_x64
gpgcheck=1
enabled=1
gpgkey=file:///etc/pki/rpm-gpg/RPM-GPG-KEY-CentOS-6

step 03
Create repodata/repomd.xm
other wise you will get this kind of error 
[Errno 14] Could not open/read file:///media /repodata/repomd.xml

[root@xw8600 Rajiv]# createrepo /media/pipeline/repo/Centos6.4_x64

Step 04
[root@xw8600 Rajiv]# yum clean all

[root@xw8600 Rajiv]# yum repolist

This will be the output in terminal:-

[root@xw8600 Rajiv]# yum repolist
Loaded plugins: fastestmirror, refresh-packagekit, security
Determining fastest mirrors
 * base: mirror.nbrc.ac.in
 * extras: mirror.nbrc.ac.in
 * rpmforge: fr2.rpmfind.net
 * updates: mirror.nbrc.ac.in
HQVFX-PIPELINE                                                                                                                          | 2.9 kB     00:00 ... 
HQVFX-PIPELINE/primary_db                                                                                                               | 1.1 MB     00:00 ... 
base                                                                                                                                    | 3.7 kB     00:00     
base/primary_db                                                                                                                         | 4.4 MB     00:04     
extras                                                                                                                                  | 3.5 kB     00:00     
extras/primary_db                                                                                                                       |  19 kB     00:00     
google-chrome                                                                                                                           |  951 B     00:00     
google-chrome/primary                                                                                                                   | 1.4 kB     00:00     
google-chrome                                                                                                                                              3/3
linuxtech-release                                                                                                                       | 1.3 kB     00:00     
linuxtech-release/primary                                                                                                               | 327 kB     00:01     
linuxtech-release                                                                                                                                    1037/1037
rpmforge                                                                                                                                | 1.9 kB     00:00     
rpmforge/primary_db                                                                                                                     | 2.5 MB     00:05     
updates                                                                                                                                 | 3.5 kB     00:00     
updates/primary_db                                                                                                                      | 1.2 MB     00:01     
repo id                                                   repo name                                                                                      status
HQVFX-PIPELINE                                            HQVFX Computing Lab Pipeline CentOS 6.4 RPM Repository                                         2,426
base                                                      CentOS-6 - Base                                                                                6,381
extras                                                    CentOS-6 - Extras                                                                                 12
google-chrome                                             google-chrome                                                                                      3
linuxtech-release                                         LinuxTECH.NET el6 production repo                                                              1,037
rpmforge                                                  RHEL 6 - RPMforge.net - dag                                                                    4,458
updates                                                   CentOS-6 - Updates                                                                               235
repolist: 14,552
[root@xw8600 Rajiv]# 


[root@xw8600 Rajiv]# yum list installed


You can see Our Repo is successfully listed in repolist and we have 2,426 rpm in our local server.

Cheers
Rajiv Sharma

DVD

How to open/extract ISO file in Linux CentOS 6.4/ all Distro


su
Password:
mkdir mountpoint
mount -o loop YourImage.iso mountpoint
ls mountpoint/

For Example :-

[Rajiv@xw8600 ~]$ su
Password:
[root@xw8600 Rajiv]# mkdir /mnt/iso
[root@xw8600 Rajiv]# mount -o loop /home/Rajiv/CentOS-6.4-x86_64-bin-DVD2.iso /mnt/iso
[root@xw8600 Rajiv]# cd /mnt/iso
[root@xw8600 iso]# ls
CentOS_BuildTag  Packages              RPM-GPG-KEY-CentOS-Debug-6     RPM-GPG-KEY-CentOS-Testing-6
EULA             RPM-GPG-KEY-CentOS-6  RPM-GPG-KEY-CentOS-Security-6  TRANS.TBL
[root@xw8600 iso]#


centos.gif

Upgrade to CentOS 6.4 from CentOS 6.3 or any older version of CentOS

1. login as root
su

2. Backup all important data
Backup /etc diretory
Backup important logs /var/log
Backup web server configs and sites
Dump MySQL databases
Dump PostgreSQL databases
Backup all what you need if something goes wrong

3.
yum list updates

4.
yum update

5.
yum clean all
yum update glibc* yum* rpm* python*
yum update

6. Restart your computer
reboot

7. Check CentOS 6.4 (Final) release info and Check your entire system
cat /etc/redhat-release

8. You have to Re install the Nvidia Drivers Again
please follow these instructions

Install Nvidia Drivers In CentOS 6.3

thats it 🙂


centos.gifnvidia_281010

Install Nvidia Drivers In CentOS 6.3

01- get Nvidia Card Information First
#lspci | grep VGA

02-download latest nvidia Drivers (make sure you care using supporting drivers with your card)
http://www.nvidia.in/Download/index.aspx?lang=en-in
#yum update

#yum clean all

#yum install kernel-devel kernel-headers gcc make

#rpm –import http://elrepo.org/RPM-GPG-KEY-elrepo.org

#rpm -Uvh http://elrepo.org/elrepo-release-6-4.el6.elrepo.noarch.rpm

03 – blacklist nouveau

#gedit /etc/grub.conf
(Edit file add nomodeset rdblacklist=nouveau at the end of the kernel line)
#echo “blacklist nouveau options nouveau modeset=0” > /etc/modprobe.d/blacklist-nouveau.conf

#yum install kmod-nvidia
#gedit /etc/grub.conf
(Add nomodeset rdblacklist=nouveau at the end of the kernel line)

#reboot
(restart your computer)
After restart — go to terminal and login as root (Change Run Level 5 to Run Level 3)

#init 3

(enter your username and password)

(again enter your root password)

go to the location of Downloaded Nvidia Driver .run file
#cd /home/rajiv/Downloads/

Make the file executable and then run it

#chmod +x  NVIDIA-Linux-x86_64-310.84.run

#./NVIDIA-Linux-x86_64-310.84.run

after installation done !!!

# init 5
restart your system and Enjoy your graphic card 🙂


Screenshot


Houdini on Linux

Posted: February 19, 2013 in FX Pipeline, Houdini, Linux

houdini12

Houdini the First Major 3D Animation Package On Linux

Linux is better in a larger studio environment, and is around 10-15% faster on the same hardware as Windows.

HDK a lot easier on Linux as well as you can use the free compiler. On windows Visual Studio is the only way and you can’t compile without the full version for 64 bit.

On linux you can automate tasks a lot easier with shell scripts/python. This is more the stuff you do next to h Houdini like batch renaming files, triggering pre and post render scripts, rendering  files.

Of course on windows you can buy (or program) little programs that do it for you as well, but I find you have much more flexibility with Linux.

Also.. most bigger studios are on linux, so you might as well learn it.


Advantages of Linux in VFX Pipeline
Low cost: You don’t need to spend time and money to obtain licenses since Linux and much of its software come with the GNU General Public License. You can
start to work immediately without worrying that your software may stop working anytime because the free trial version expires. Additionally, there are large repositories from which you can freely download high quality software for almost any task you can think of.
The most obvious advantage of using Linux is the fact that it is free to obtain, while Microsoft products are available for a hefty and sometimes recurring fee. Microsoft licenses typically are only allowed to be installed on a single computer, whereas a Linux distribution can be installed on any number of computers, without paying a single dime.
Stability: Linux doesn’t need to be rebooted periodically to maintain performance levels. It doesn’t freeze up or slow down over time due to memory leaks and such. Continuous up-times of hundreds of days (up to a year or more) are not uncommon.

Performance: Linux provides persistent high performance on workstations and on networks. It can handle unusually large numbers of users simultaneously, and can make old computers sufficiently responsive to be useful again.
Linux is perfect for those old computers with barely any processing power or memory you have sitting in your garage or basement collecting dust. Install Linux and use it as a firewall, a file server, or a backup server. There are endless possibilities. Old 386 or 486 computers with barely any RAM run Linux without any issue

Network friendliness: Linux was developed by a group of programmers over the Internet and has therefore strong support for network functionality; client and server systems can be easily set up on any computer running Linux. It can perform tasks such as network backups faster and more reliably than alternative systems.

Flexibility: Linux can be used for high performance server applications, desktop applications, and embedded systems. You can save disk space by only installing the components needed for a particular use. You can restrict the use of specific computers by installing for example only selected office applications instead of the whole suite.

Compatibility: It runs all common Unix software packages and can process all common file formats.

Choice: The large number of Linux distributions gives you a choice. Each distribution is developed and supported by a different organization. You can pick the one you like best; the core functionalities are the same; most software runs on most distributions.

Fast and easy installation: Most Linux distributions come with user-friendly installation and setup programs. Popular Linux distributions come with tools that make installation of additional software very user friendly as well.

Full use of hard disk: Linux continues work well even when the hard disk is almost full.

Multitasking: Linux is designed to do many things at the same time; e.g., a large printing job in the background won’t slow down your other work.

Security: Linux is one of the most secure operating systems. “Walls” and flexible file access permission systems prevent access by unwanted visitors or viruses. Linux users have to option to select and safely download software, free of charge, from online repositories containing thousands of high quality packages. No purchase transactions requiring credit card numbers or other sensitive personal information are necessary.
In line with the costs, the security aspect of Linux is much stronger than that of Windows. Why should you have to spend extra money for virus protection software? The Linux operating system has been around since the early nineties and has managed to stay secure in the realm of widespread viruses, spyware and adware for all these years. Sure, the argument of the Linux desktop not being as widely used is a factor as to why there are no viruses. My rebuttle is that the Linux operating system is open source and if there were a widespread Linux virus released today, there would be hundreds of patches released tomorrow, either by ordinary people that use the operating system or by the distribution maintainers. We wouldn’t need to wait for a patch from a single company like we do with Windows.

Open Source: If you develop software that requires knowledge or modification of the operating system code, Linux’s source code is at your fingertips. Most Linux applications are Open Source as well.

Today the combination of inexpensive computers and free high-quality Linux operating systems and software provide incredibly low-cost solutions for both basic home office use and high-performance business and science applications. The available choices of Linux distributions and Linux software may be overwhelming at first, but if you know where to look, it shouldn’t take long for you to find good online guidance.
Disadvantages of Linux
Learning curve

I won’t lie to you; Linux is going to take some time to learn. I know that our society likes to be instantly gratified. Learning Linux is definitely worth your time, but to really master it, you will need to spend some good time in front of your machine tinkering with things. Don’t expect to be an expert after reading something like “Linux for Dummies”. If you are contemplating this for your company, you will need to budget some money for training and learning time.

More technical ability needed

You will want to make sure that you train someone in Linux really well. Alternately, you could hire someone who has experience with Linux. A good Linux administrator needs to be on hand as you start to migrate your systems over. This is a disadvantage financially, at least in the beginning. You may find over time, however, that you only need a temporary administrator to handle the routine tasks.

Not all hardware compatible

Some of the latest and greatest hardware that is being produced is not compatible with Linux. At least, not yet. The people that contribute program code and drivers to the Linux kernel are great at including support fairly quickly. Until that time, not everything you buy for hardware in your system may work. I’ve had to rely on third-party drivers and other means to make hardware like a new Ethernet card work. Eventually, the support will be built in. One thing you can do is before your purchase, ask if the hardware vendor has support for Linux. Some manufacturers do write their own Linux drivers and distribute them with your purchase, making it very easy to integrate with your existing system.


alembic_logo

option 01

http://code.google.com/p/alembic/wiki/GettingAlembic

Alembic is:

For computer graphics professionals working with large, complex scenes;

Who need to quickly, reliably transfer CG assets between heterogeneous software tools in order to make use of the widest range of available functionality;

Alembic is an Open, Portable, Computer Graphics Storage Format;

That is able to accurately store the full range of existing CG primitives, is open and easily extensible for custom data needs, and is fully supported in all the major CG animation, rendering, and simulation tools;

Unlike FBX, which is not extensible or open, or COLLADA, which is unable to store large assets, or custom solutions using GTO, which are non-standardized and require too much implementation-specific knowledge.

if you want a really smooth translation, get Maya 2013, it has alembic export, then get Houdini 12, it has alembic import, export the whole scene to alembic and you will have the camera too in one pass, works painlessly.

Shaders cannot be exported, although fbx imports with some shaders, but that one in Houdini is not good for serious shading.

Alembic doesn’t support shaders.

workflows to send stuff to Maya for rendering from Houdini. The best way to do that is with Alembic but the problem with that is you need to have all geometry that’s going to be exported be visible at the first frame.

OBJ sequences is the option, which is kind of lame since it just static geometry across frames but it works for things like newly-spawning geometry.

option 02

Filmbox FBX

autodesk_fbx_badge_150x265

Houdini understand FBX format. you can transfer dynamics from Houdini to Maya.

You should use the fbx exporter from maya, but there are some rules to be followed:

1. use maya’s geometry cache to generate a vertex cache.
2. in geo cache’s option check double precision
3. now the tricky part, if you have any history on the polygonal surface node, fbx export will drag it with export, so the best way is to duplicate your caracter geometry(only that) with shift+d, and import the geo cache onto that, so you will end up with a clean geometry and a cache file.
4. in fbx export window you have to uncheck smoothing groups under geometry
5. also here you have to check animation and check geometry cache file and choose a historySwitchSet
6. hit export (of course give an fbx filename), and if you choose a location there should be an fbx file exported and a folder beside it which contains the cache

7. in houdini choose File->Import->Filmbox FBX..
8. in the window choose your fbx file, uncheck everything except geometry and animation
9. choose unlock geometry and deformation
10. choose import directly into /obj network
11. houdini will import your model and assign the vertex cache via CHOPs

So animate in maya then export the clean model with vertex cache via fbx and import

Option 03


Hi

this is a simple process to change missing file path name when you open your nuke comp in Linux workstation which is previously done in windows PC.


this is a example snapshot of Nuke File Path Missing Error:-

nuke_error_01


step 01:- select all nodes
Ctrl+a
step 02:-  open Search and replace option window in Nuke
Ctrl+Shift+/


Step 03 :- LINUX

change your path here


nuke_error_02


Step 04: In Window PC

Nuke_error_03


And your all Render Passes will be load successfully 🙂


Nuke_error_04


Cheers!

Mount NTFS on linux Centos

Posted: October 31, 2012 in FX Pipeline, Linux


If you get the error : mount: unknown filesystem type ‘ntfs’ do the following to mount NTFS to a linux Centos

go to terminal 

su

wget http://packages.sw.be/rpmforge-release/rpmforge-release-0.3.6-1.el5.rf.i386.rpm
rpm -Uhv rpmforge-release-0.3.6-1.el5.rf.i386.rpm

yum install fuse fuse-ntfs-3g dkms dkms-fuse

mkdir /mnt/usb

mount -t ntfs-3g /dev/sdc1 /mnt/usb

PyMEL for Maya

Posted: October 31, 2012 in FX Pipeline, Linux, Maya


PyMEL makes python scripting in Maya work the way it should. Maya’s command module is a direct translation of MEL commands into python functions. The result is a very awkward and unpythonic syntax which does not take advantage of python’s strengths – particularly, a flexible, object-oriented design. PyMEL builds on the cmds module by organizing many of its commands into a class hierarchy, and by customizing them to operate in a more succinct and intuitive way.


go to : http://www.luma-pictures.com/tools/pymel/docs/1.0/index.html


Special thanks to those studios with the foresight to support an open-source project of this nature: Luma Pictures, Attitude Studio, and ImageMovers Digital.


Maya 2012 x64 installation in CentOS 6.3  / CentOS 7

same installation process work for Maya 2015 in CentOS 7
Step01
First, install all these is needed for CentOS, do this before the installer
(you can also do this after Maya installation, but these are required to start Maya)

– Go to terminal and paste these commands:-

yum install mesa-libGLw
yum install csh
yum install libXp libXp-devel
yum install gamin audiofile audiofile-devel e2fsprogs-libs
yum install tcsh
yum install xorg-x11-fonts-ISO8859-1-100dpi
yum install xorg-x11-fonts-ISO8859-1-75dpi
yum install liberation-mono-fonts liberation-fonts-common liberation-sans-fonts liberation-serif-fonts

Step02
Go to Maya setup files  folder (where all RPM files are contained)
(before start installation – go to maya setup folders and find “setup” file,  right click and make permissions – allow executive file must checked on)
enter in administrator mode:-

su –
cd /home/rajiv/linux/maya2012
./setup

enter serial number etc.

////maybe try to chmod the .bin files
cd /usr/autodesk/maya2012-x64/bin
chmod 777 maya
chmod 777 maya2012

maya
or
./maya
to launch

Step03 (TroubleShoot Maya 2012 Issues in Linux)

//if you get…..error while loading shared libraries: libXp.so.6: cannot open shared object file: No such file or directory
yum install libXp

problems with middle mouse button? (when you try and pan with middle mouse?)
(Maya) window->settingAndPreferences>preferences->interface
you’ll see an option to enable/disable the mouse scroll wheel.

//problems with the alt key?  (Maya Viewport is not rotating)
go to – (CentOS)system>prefs>windows too for alt key behaviour
make it “SuperUser”


problems with fonts
system>administration>add remove programs
search for these packages
xorg-x11-fonts-ISO8859-1
install them all

there will be problems with the hotkeys and shortcuts (see the apple keyboard section below)

//if there is beef with sound files
yum install audiofile-devel
// and if that doesnt work maybe?
ln -s /usr/lib/libaudiofile.so.0 /usr/lib/libaudiofile.so

_______to make a launch icon
_______copy this command into the ‘command’ part of the preferences for the icon
/usr/autodesk/maya2012-x64/bin/maya

Cheers !!
Rajiv Sharma


CentOS for Animation and VFX Pipeline.

Hi Friends,
When we talk about Linux Distributions, i personally like Linux Mint 13.
Since i installed Linux Mint in my HP Elitebook Workstation, i found every thing is running in my laptop 3 times faster than window7.
most of the time i am using my Elitebook for Houdini and Realflow simulations and its work great.
But Maya is very unstable and not working fine in Linux Mint.
Because i have done installation of maya by recompiling RPM Files to DEB files.

then i decide to switch to other Linux Distro.

After lots of Google search and compare all Linux os I found CentOS will be the better Option for Animation and VFX Studios Pipeline.

CentOS is reliable and stable linux Operating system .
This Linux Distribution is very popular for servers and workstations.
centOS is Based on RHEL (Red Hat Enterprise)
easyly install RPM files.
there are lots of Animation and VFX studios using centOS in there entire facility include Dr D studios, Sydney Australia (I worked there on Happy Feet 2 movie).
Maya, Houdini, realflow Nuke and Naiad is working fine.
I Build Render Farm application for Linux using codes and lib of ArsenalSuite
,Asset Management softwares , Production Tracking Applications, Pipeline tools for Houdini, Maya, Nuke.
now every thing is working fine, fast and stable.

Final Conclusion:-
Ubuntu Based Linux Mint is a great Desktop Linux Operating system.
all latest softwares come with installation DVD. and interface is friendly for windows users.
APT (Advance Pakaging Tool) is very good and fast.

CentOS is great for big organisations, companys. It is derived entirely from the Red Hat Enterprise Linux (RHEL) distribution. CentOS exists to provide a free enterprise class computing platform and strives to maintain 100% binary compatibility with its upstream source, Red Hat. CentOS stands for Community enterprise Operating System.
All major 3d Application Officially support Red Hat. and CenOS is based on same.

Download from here https://www.centos.org/  (It is Free)

Cheers!

Rajiv Sharma


     Arsenalsuite – Render farm and cluster management tools.


Hi,
I am doing some R&D on building Render Farm software for Windows and Linux OS.

I am using CentOS 6.3 and Window 7  both are 64bit OS.

I found ArsenalSuit is good and The best thing is that you can download the source code and adapt it to your company requirements.
Previously, I used this software in Dr D studios for Happy Feet 2 movie.
But The problem with Arsenal is there is no complete package for installation. you need to build it from scratch.

The very first impression is that you don’t know what you need from the download site. So I downloaded all windows packages.

Okay, I tried to get an overview of the project. The website says its still a beta in-progress project and indeed it feels exactly like that. There is no simple install package, there are some information about building the tools from scratch. But you will need some software building experience if you dare to use this project. And you will have to spend a lot of time to dig into the deeps of the project, build all tools and setup correctly. To be honest, I gave up after some time, simply because I did not find out a clean description how to start the arsenal suite on windows. Maybe this will change in the future because the feature list and screenshots look really good for a free system. For example, it seems you need to setup a postgresql database with some scripts, but these scripts are only available in the source code. To build the source code you will need Qt installed and other prerequisites.

About ArsenalSuite
Home Page – http://code.google.com/p/arsenalsuite/
Originally developed by Blur Studio, Arsenal was a replacement for 3dsmax’s BackBurner. It’s now a robust cross platform render management platform supporting many renderers, including 3dsmax, Maya, Houdini, 3delight, XSI, Nuke, Fusion, Shake and After Effects.
The core is written in C++ using Qt, and extensive python bindings using sip/PyQt provide the ability to customize and extend nearly every component. There are GUI tools to manage the queue, custom submitters for some packages, and a generic Python API for others.
A Google Group for discussion exists here: https://groups.google.com/group/arsenalsuite

Overview Diagram of Arsenal

StoneDiagram   A diagram displaying the structure of the Stone library
Introduction:-

A diagram displaying the structure of Stone, and how classmaker generates C++ and Python classes. This provides the core ORM system Arsenal and other tools can build on.

Details:-

Screen shots:- http://code.google.com/p/arsenalsuite/wiki/Screenshots

SETUP PROCESS IN WINDOWS 7

I started building ArsenalSuite In my Windows7 workstation by following process:-

OS – Windows 7 64bit

step01
Download files and lib from following link:-
http://code.google.com/p/arsenalsuite/downloads/list

step02
install following setups:- (google search and download, all are free)
burner_20111212_install_win32-msvc2008_64.exeburner_20111212_install_win32-msvc2008_64.exe

freezer_20111212_install_win32-msvc2008_64.exe

graphviz-2.28.0.msi

mercurial-2.3.2-x64.msi

postgresql-8.3.21-1-windows.exe

PyQt4_gpl_4.8.5-0-Py2.6-win32-msvc2008_64.exe

python-2.5.amd64.msi

python-2.6.6.amd64.msi

sip-4.13-Py2.6-win32-msvc2008_64.exe

xmpppy-0.5.0rc1.tar.gz

qt-win-4.6.2-vs2008.exe

uberSVN-1210.exe (Subversion)

step03
set QMAKESPEC=win32-msvc2008  (set environment variable)
install nsis from http://nsis.sourceforge.net
install plugin http://nsis.sourceforge.net/Processes_plug-in into plugins/
put AddToPath.nsh into include/

Step04
Build database and roles in PostgesSQL

create database (Your database Name)
Build following roles:-
burner –  with superuser inherit nocreaterole nocreatedb login password
freezer – with nosuperuser inherit nocreaterole nocreatedb login password
farmer –  with superuser noinherit nocreaterole createdb login password
farmers – with nosuperuser inherit nocreaterole nocreatedb nologin
submitter – with nosuperuser inherit nocreaterole nocreatedb login password

I am still working on setup of this software .. i will update complete installation process once things will move forward.

You can add your suggestions and knowledge to build this tool

please reply if you can contribute in building ArsenalSuite

Cheers !
Rajiv Sharma


  1. Not Fully Grasping the Maya Architecture and How the Python API Leverages It
    If you don’t completely understanding the Maya architecture, command engine and the Dependency Graph, you will run into trouble as your tools get more complex. Take the time to learn these components as they are very different than any other animation product. Because of this complexity, it makes Maya more flexible and powerful than any other product. Check out the free Maya Python API webcast recording located here (www.autodesk.com/developmaya)
  1. Trying to live in a Bubble and Teach Yourself Everything
    There is no possible way to memorize or learn every single Maya API class, so don’t be shy to use the resources available. As they say “Be Resourceful” and learn from others successes, mistakes and questions. Maya has been around for over ten years, and there is lots of API information out there (www.autodesk.com/developmaya). Also, you can check out the new book “Maya Python for Games and Film: A Complete Reference for Maya Python and the Maya Python API” by Adam Mechtley and Ryan Trowbridge.

3.    The Reference Documentation is written for C++, but you are Using Python
If you do not know C++, at first glance the reference documentation will be very confusing!  But don’t worry; just put your eye blinders on to certain things when reading it. Because Python is a more simplified language than C++ (but none the less powerful), there are certain components in the documentation you can ignore. For example the class MString and MStringArray are not available in Python and instead you will work with strings as they are in native Python. Another example is that there is no MStatus class in Python and instead you will use standard Python error checking (try, except, catch). Try to think of this as having a mini translator going on in your brain, you see MStatus, so you just ignore it!

4.       The Reference Documentation is written for C++, but you are Using Python
If you do not know C++, at first glance the reference documentation will be very confusing!  But don’t worry; just put your eye blinders on to certain things when reading it. Because Python is a more simplified language than C++ (but none the less powerful), there are certain components in the documentation you can ignore. For example the class MString and MStringArray are not available in Python and instead you will work with strings as they are in native Python. Another example is that there is no MStatus class in Python and instead you will use standard Python error checking (try, except, catch). Try to think of this as having a mini translator going on in your brain, you see MStatus, so you just ignore it!

5.       Knowing when and how to Use MScriptUtil Class
Many of the API methods in Maya require that one or more of their parameters be passed as pointers or references (return values can be pointers or references as well). Because Python does not have the concept of references or pointers, you will need the utility class called MScriptUtil for working with those pointers and references in Python. MScriptUtil bridges this gap between Python and its underlying C++ API. When you see the characters * or & in the documentation for simple data types like integers and floats, think MScriptUtil!

6.  Your Python API Code is not Working, and you cannot find the Problem
When working with the Python API, like all humans, you will have errors or code you want to debug; but how the heck do you debug it? Unfortunately, there are no out-of-the-box tools in Maya, but there are some good solutions available. Cyrille Fauvel from Autodesk has integrated a Maya Python debugger into the Eclipse IDE. The details are available on Autodesk.com, at the Maya Developer Center page. Dean Edmonds also from Autodesk has integrated the PDB debugger into the Script Editor within Maya by overriding the stdin and stout functions. Also, if you Google “Python in Maya” group you will see other solutions

7.   Working with Multiple Versions of Maya Equals Multiple Versions of Python
If you are working on multiple versions of Maya, then you need to keep in mind that you will need to have multiple version of Python. Also if you are using PyQt, multiple versions of PyQt will need to be installed on your computer. As nice as it would be to use the same version of Python and PyQt for every version of Maya, it’s just not realistic as things are always improving in the Python and PyQt releases. Keep yourself educated in the Maya documentation for the versions that are used in each major release, and on which platform.

8.  Awareness of Potential Python API Performance Penalties
In certain situations when computation involves complex or many API calls, the Python API may take a performance penalty compared to the C++ API. This is because the Python API sits on top of the C++ API. This results in an extra level of conversion through C++ and as well as Python is an interpreted language which is slower by nature. For example if you are thinking of doing a Python API shader, C++ will be the better choice, but for most other tasks Python is perfect!

9.  Must use Autodesk Specific Version of Qt for Building PyQt
Building PyQt to work with Maya is a three step process. First you need to compile Qt using the Autodesk’s Modified Qt Source Code (new for 2012) that is located on the Autodesk.com site. Then you need to compile SIP (generates Python bindings for C++) against your built Qt libraries. Last, you need to compile PyQt against your built SIP libraries. Check the website for the correct versions or you could have some difficulties down the road in your tools

10. Python Plug-in Disclosure
You cannot hide your Python API code from users! If you’re a games developer looking to create Python plug-ins in-house and not worried about protecting your code, then feel free to code away. But it you want to protect, or commercialize and sell your hard work, you should consider using C++ to create your plug-ins.

11. Not Understanding the Difference between Python Script and Python API
Maya has four programming interfaces, two of which are using the Python language. It’s important to know the distinction between the terminology of Python Script and the Python API, because they each access different functionality within Maya (with very little overlap). The other two interfaces are Maya Embedded Language (MEL) and the C++ API


Linux vs Windows ..? for Animation and VFX Work

I am Using  Window 7 at Office and Linux Mint 13 at Home.
Windows is more common, and easier to set up for a single user.
Linux is better in a larger studio environment, and is around 10-20% faster on the same hardware as Windows.
I found Houdini, Maya, and realflow is playing a lot faster In Linux compare to windows. this result is based on my Heavy Simulations and Rendering task.
Maya 2012 64bit is having some issues bugs (Because, I am using debian based Linux Operating system and Maya Native design for Red Hat OS  RPM.)

I Found network speed in Linux is 10 to 25 % fast that windows (this is based on Realflow simulation data (Grid Domain Particles, Meshing) , Maya Fluids and N Particles Cache,  Read and write on network disk)

Pipeline tools design and intigration in production is better in Linux compare to window 7.
compiling extra plugins in the HDK a lot easier on linux as well as you can use the free compiler. On windows Visual Studio is the only way and you can’t compile without the full version for 64 bit.
On linux you can automate tasks a lot easier with shell scripts/python. This is more the stuff you do next to houdini, like batch renaming files, triggering pre and post render scripts, rendering  files.
Of course on windows you can buy (or program) little programs that do it for you as well, but I find you have much more flexibility with linux.
Also.. most bigger studios are on linux.

Linux is Free for any use.  and  for windows you have to pay 12,000 INR
🙂

Cheers!
Rajiv Sharma
FX TD


Autodesk Maya File references between Linux and Windows

Issue : I have created a Scene file in windows and reference characters and assets from Z:/ Drive (production Drive).

these Maya Scene files i am not able to open in Linux Workstations (Because linux doesn’t have Z:/ Drive )

For Example:

Z:/ is root of production drive in Windows

(Z:/Assets/Characters/Scooby/ , Z:/Production/Scenes/Seq05/Sh001/FX/ , Z:/Assets/Textures/Hdri/ )

/project is root of Production drive in Linux

Same Folder structure in Linux After Mount by SAMBA window share looks like that :-

(/project/assets/Characters/Scooby , /project/Production/Scenes/Seq05/Sh001/FX/ , /project/Assets/Textures/Hdri/ )

to resolve the issue of missing path of Reference maya files

Add these two line in userSetup.mel (contained in Maya Scripts folder)

dirmap -en true;

dirmap -m “Z:/” “/project”;

restart maya and Enjoy 🙂

-Rajiv Sharma
, FX TD


How to install Houdini in Linux ..?

Open a terminal
Change to the root user if installing Houdini outside of your home directory

If you are installing the License Server, you must install the software as the root user because the License Server files are written to /usr/lib/sesi.
If you are not installing the License Server, the software can be installed as a non-root user

Unpack the downloaded archive

tar.gz archive (type: tar -xvzf file.tar.gz)

Example:
tar -xvzf houdini-10.0.249-linux_x86_64_gcc4.1.tar.gz
This should create a directory called houdini-10.0.249-linux_x86_64_gcc4.1/

7z archive (type: 7z x file.7z)

Example:
7z x houdini-10.0.249-linux_x86_64_gcc4.1.7z
This should create a directory called houdini-10.0.249-linux_x86_64_gcc4.1/

Run the houdini.install script:

cd houdini-10.0.249-linux_x86_64_gcc4.1/
./houdini.install

* You can also double click on the houdini.install file with your mouse. It will run the installer in a terminal.
Follow the instructions in the installer. The default installation wants to place the software in /opt/hfs10.0.249. If installing as a non-root user, you must change this default installation path. Example: /home/janedoe/hfs10.0.249
You should now be able to access Houdini in 2 ways:

Applications->Side Effects Software->Houdini 10.0.249
In a terminal(shell) type:

cd ; (Example: cd /opt/hfs10.0.249)
source houdini_setup;
type houdini (or hescape to start Escape) at the command prompt

The command “source houdini_setup” initializes the current shell’s environment to run Houdini. You may want to add the above line to your .login file. Refer to the contents of the houdini_setup script for more details.


DrQueue is a powerful open source distributed render farm manager, used for a range of applications across the visual effects industry and for general batch processing jobs in science, engineering and finance. DrQueue is licensed under GNU GPL Version 3.

Get DrQueue!

http://www.drqueue.org/cwebsite/

VFX Pipeline in Linux Mint 13

Posted: October 4, 2012 in FX Pipeline, Linux

Free Download Linux Mint DVD from :- http://www.linuxmint.com/download.php

this is great linux distro for VFX Pipeline.


Linux Mint, a distribution based on Ubuntu, was first launched in 2006 by Clement Lefebvre, a French-born IT specialist living in Ireland. Originally maintaining a Linux web site dedicated to providing help, tips and documentation to new Linux users, the author saw the potential of developing a Linux distribution that would address the many usability drawbacks associated with the generally more technical, mainstream products. After soliciting feedback from the visitors on his web site, he proceeded with building what many refer to today as an “improved Ubuntu” or “Ubuntu done right”.

But Linux Mint is not just an Ubuntu with a new set of applications and an updated desktop theme. Since its beginnings, the developers have been adding a variety of graphical “mint” tools for enhanced usability; this includes mintDesktop – a utility for configuring the desktop environment, mintMenu – a new and elegant menu structure for easier navigation, mintInstall – an easy-to-use software installer, and mintUpdate – a software updater, just to mention a few more prominent ones among several other tools and hundreds of additional improvements. The project also designs its own artwork, while its reputation for ease of use has been further enhanced by the inclusion of proprietary and patent-encumbered multimedia codecs that are often absent from larger distributions due to potential legal threats. However, one of the best features of Linux Mint is the fact that the developers listen to the users and are always fast in implementing good suggestions.

While Linux Mint is available as a free download, the project generates revenue from donations, advertising and professional support services. It doesn’t have a fixed release schedule or a list of planned features, but one can expect a new version of Linux Mint several weeks after each stable Ubuntu release. Besides the “main” edition which features the GNOME desktop, the project also builds a variety of semi-regular “community” editions with alternative desktops, such as KDE, Xfce and Fluxbox. However, these are often completed several months after the release of the “main” GNOME edition and may sometimes miss some of the “minty” tools and other features found in the project’s flagship product. A more recent addition to the Mint line-up is a “rolling-release” edition based on Debian’s testing branch. Linux Mint does not adhere to the principles of software freedom and it does not publish security advisories.

  • Pros: Superb collection of “minty” tools developed in-house, hundreds of user-friendly enhancements, inclusion of multimedia codecs, open to users’ suggestions
  • Cons: The alternative “community” editions don’t always include the latest features, the project does not issue security advisories
  • Software package management: APT with mintInstall using DEB packages (compatible with Ubuntu repositories)
  • Available editions: A “main” edition (with GNOME), a variety of “secondary” editions (with KDE, Xfce and Fluxbox), Linux Mint “Debian” edition (rolling-release with GNOME or Xfce)